Make your own greeting cards
Version 1.2, ©2006 by Dale Cotton, all rights reserved.
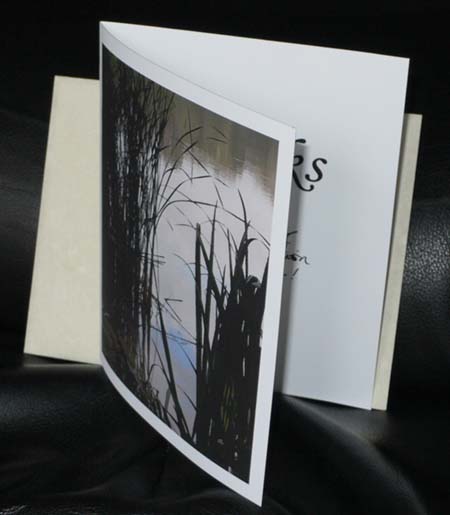
Fig 1: Finished card
Tired of Hallmark cute (not to mention Hallmark prices)? If you have a photo-quality inkjet you can do better - here's how:
You will need the following supplies:
- Editing software. I happen to use Photoshop in this tutorial.
- JPEG or better picture of appropriate subject matter.
- Double-sided 8.5x11" paper. I use Epson's Double-Sided Matte.
- Envelopes. I use First Base Inc's Antique Bond, size A2 (5.75x4.375").
- Pencil, ruler, and razor knife or scissors.
Step 1
Find one of your digital pictures that you want to use all or part of on the front of your card. Open it in your editing program then resize and/or crop. Ideal is a rectangle about 5" x 3.75" (4:3 aspect ratio) at your usual pixels per inch setting (anywhere around 180 to 240 ppi should do fine) This will just fit on the front of the card with a narrow margin all around. I ended up with an image 927 by 1200 pixels.
An image that is not 4:3 can be used: it just means uneven margins. Also, if the printable area on your printer is smaller than mine, you will need to make your image proportionally smaller. But for your first go-through I recommend starting at 5" x 3.75".
Now rotate the picture by 180� to turn it upside down (trust me ;).
Step 2
Add a new blank layer, then use your text tool to create a message for the inside of the card.
If your editing program does not support layers, simply create two separate image files - one for the picture, one for the message. Keep their size and ppi setting the same.
Pick a font and font size, such that the print is half to three-quarters inch tall. Just create the basic message, such as Thanks! or Get Well Soon! or Merry Christmas. You can handwrite any further message to suit the recipient and occasion afterward on each individual card. Now rotate the message text by 180�; centre it from left to right; and move it somewhat below centre from top to bottom. Save your work to a new file (meaning: don't overwrite the picture file of the original image!).

Fig. 2: Both layers showing at once
Step 3
Since the exact settings - esp. margins - will depend on your printer, your first few prints will be trial and error, so start with cheap paper and minimal print quality.
In the print dialogue set both margins to an initial value of 0.1" and orientation to portrait.
8.5x11" paper folded into fourths yields an area of 4.25" x 5.5". Assuming your image size is 5" x 3.75" that leaves 1/4" all around for margins. The problem is that most printers don't print all the way to the edge of the paper; so the difference between the printable area of a page and the full size of the page needs to be subtracted from the margins.
Printing is a little complicated to explain, but the result you want is to have the picture upside down in the upper left corner and the message right side up in the lower right corner on both the front and back side of the paper (see Fig. 3). You do this by making two passes with only the picture layer showing, turning the page over between passes; then two more passes with only the message layer showing, also turning the page over between passes. All four passes are done with the same margin and other settings; all you change from pass to pass is which layer shows. If your printer has a straight-through paper path (top-loading or back-loading), the above should be fairly straight-forward.
My Epson printer is front-loading with a single-loop paper path, so it prints on what is the bottom of the paper as it sits in the tray. After the first printing pass that prints the image in the upper left corner, I simply re-feed the paper as it lies in the out tray. After I have the image on both sides, I hide the picture layer and reveal the message layer, then flip the paper from left to right to print the first pass of the message text, then re-feed without flipping to get the second pass of the message text.
However you get there, the result should look like this (held up to a window for see-through) - minus the red, green, and blue labelling, of course:

Fig. 3: After printing all four passes
Step 4
Make a faint pencil mark at the half way point on both the top and bottom of the long side of the printed page. Put a straight edge between the two marks, then cut the paper in half with a razor knife.
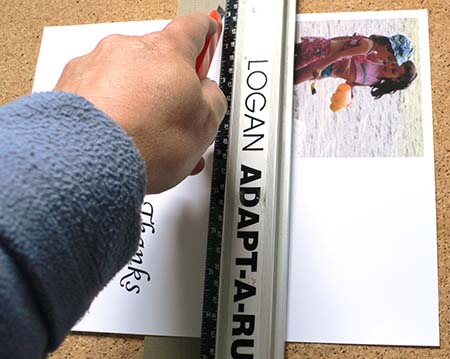
Fig. 4: Cutting print in two
Fold each half such that it makes a card with the picture on the front and the message text on the inside leaf (see Fig. 1). If the margins around the picture are significantly off, then change your margin settings in your editing program and print another test sheet.
Step 5
Create a new blank layer, then add detailed printing instructions for future reference and re-save the file.
* * *
These instructions will get you to a basic greeting card. Alternately, use an image in landscape orientation for a card that opens to the top instead of to the left. You can of course get fancy by adding overlay text on the front image, adding an image to the inside of the card, adding an appropriate rhyming sub-text to the main message, or even adding a logo to the bottom back of the card. Print several cards at a time so they're ready for use when the occasion arises.