The Aspect Ratio Conundrum
Version 1.1, © 2006 by Dale Cotton, all rights reserved.

Fig 1. Print with aspect ratio of 7:10 framed at 18x24"
This is an issue that confounds every new photographer making his or her first prints, whether at the corner store or at home.
Aspect Ratios and Cameras
Aspect ratio is the difference between the length and the width of a rectangular object. For example, the typical 4x6" mini-lab print of a vacation snapshot has an aspect ratio of 4:6, which can be reduced to 2:3.
Grade school arithmetic tells us that the same picture that exactly fits on a 4x6" print can be printed to 8x12" or 10x15" without changing the 2:3 aspect ratio.
The vast majority of photographers currently work with either a dSLR camera or a digital compact (point & shoot) camera. dSLRs take pictures with an aspect ratio of 2:3 and compacts, 3:4. This is similar to the dichotomy between the new wide screen HDTV formats and the traditional 3:4 SDTV format. There are also more extreme cameras that take panoramic aspect ratios, such as 9:16; or square pictures, such as the Hasselblad's 6x6.
Here are some of the most familiar aspect ratios - from elongated to square - expressed in different ways:
| Common | Ratio to 10 | As decimal | Graphic |
|---|---|---|---|
| 1:2 | 5:10 | 0.500 | |
| 9:16 | 5.6:10 | 0.563 | |
| Golden ratio | 6.2:10 | 0.618 | |
| 2:3 | 6.7:10 | 0.667 | |
| 7:10 | 7:10 | 0.700 | |
| 3:4 | 7.5:10 | 0.750 | |
| 4:5 | 8:10 | 0.800 | |
| 1:1 | 10:10 | 1.000 |
Table 1. Several common imaging aspect ratios
Aspect Ratios and Media
Why this matters to photographers (and painters) is because paper, canvases, mat boards, frames, etc. are sold in certain standard sizes for production and marketing convenience: see this page on Harald Johnson's DP&I site. In North America we are most familiar with letter-sized paper, which is 8.5x11". (Apparently, this rather peculiar size comes about from quartering the most common mold-made sheet size that is now the US C paper size of 17x22".) Let's add the height to width ratios of the most common paper sizes to our table:
| Common | Ratio to 10 | As decimal | Graphic |
|---|---|---|---|
| 1:2 | 5:10 | 0.500 | |
| 9:16 | 5.6:10 | 0.563 | |
| US 8.5:14 | 6.1:10 | 0.607 | |
| Golden ratio | 6.2:10 | 0.618 | |
| US/B 11:17 | 6.5:10 | 0.647 | |
| 2:3 | 6.7:10 | 0.667 | |
| US/+B 13:19 | 6.8:10 | 0.684 | |
| 7:10 | 7:10 | 0.700 | |
| All ISO/Metric | 7.1:10 | 0.707 | |
| 3:4 | 7.5:10 | 0.750 | |
| US/C 17:22 | 7.8:10 | 0.772 | |
| US/A 8.5:11 | 7.7:10 | 0.773 | |
| 4:5 | 8:10 | 0.800 | |
| 1:1 | 10:10 | 1.000 |
Table 2. Common paper sizes added
A painter has no problem. He buys a pre-sized canvas which comes in standard sizes like 24x30" or paints on a standard sheet of paper. We will put the idyllic world of painting behind us and consider the plight of the photographer for the rest of this essay.
We can see from the Table 2 that the 3:4 aspect ratio of the compact camera and the 4:5 ratio of the view camera are reasonable matches for printing on letter-size paper.
We can also see that the ubiquitous 4x6" drug store print has a very different, 2x3, aspect ratio, which is exactly matched by SLR cameras, whether digital or 35mm film. At the other extreme there is the US B or ledger paper size of 11x17", which is also very close to a 2:3 aspect ratio. I assume the new 13x19" inkjet paper size came about by adding a 1" margin to 11x17", which in turn used to be widely considered the maximum acceptable enlargement for 35mm film.
The Conundrum
That's all very well - but if a compact camera user wants to print on 11x17" paper stock or a SLR user wants to print on letter-sized paper there would seem to be a mismatch:
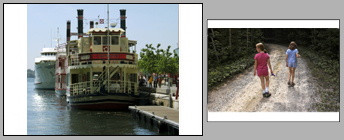
Fig 2. Wastage: A) Compact frame on 11x17"; B) SLR frame on 8.5x11"
This leaves us with two equally unsavory options: chop off part of the image (cropping) to fit the aspect ratio of the paper or make the image smaller and waste part of the paper. Here's what we can do:
Use roll paper
An alternative in some cases is to print on roll paper stock, which allows us more flexibility. For example, if I have a roll of 13" paper, I could set the length to 19" to match US +B or I could set the length to 17.3" to create a custom paper size that matches the 3:4 aspect ratio of a compact camera. The downside of this is that I now have to find or more likely custom-make the mat and frame for the print.
Chop down the paper
Looking at Fig. 2, we see that we can simply clip off the white/unused area of paper after printing. At the price of archival paper this hurts; but it also introduces the problem of finding a matching mat and frame.
Crop the image
There is a tongue-in-cheek rubric in photography that any image can be improved by cropping (which includes the image you just cropped, ad infinitum). The improvement posited is a matter of composition; cropping has the opposite effect on image quality, because the number of pixels is reduced.

Fig 3. Cropping a 2:3 image to fit on letter-sized paper
Capturing a picture with a camera is nothing more than cropping the original scene. Most cameras have one fixed aspect ratio, such as the 2:3 of SLRs. Some compositions want to have a different aspect ratio than the camera's, which leaves us no choice but to crop in software or the darkroom after exposure and hopefully to crop to the aspect ratio of a standard paper size. But some compositions adamantly refuse cropping to match the paper size we want to print at.
Full-bleed vs. margins. The 4x6" snapshot print you get from the corner mini-lab has no margins around the image area: this is called full-bleed and seems to be the holy grail of many a small format inkjet owner. While margins admittedly reduce the image size they do serve several purposes: they make it easier to handle a print without leaving fingerprints; they make framing easier; and they arguably increase the life of the print because yellowing reputedly starts at the edges and creeps in.
My own approach
What I used to do for my art photography was simply edit the picture to its optimum state including the minimal crop to produce a desirable composition, print that to maximally fill whatever paper size I was targeting, then custom mat and frame to fit.
What I now do is to crop in software to target one of three aspect ratios: 6.7:10 (2:3), 7:10, or 7.5:10 (3:4) as often as possible. I choose whichever of those three ratios comes closest to what I see as the ideal composition for a given image, then sometimes relocate a figure or object to achieve a desirable composition (see here for an extreme example of turning a 2:3 image into a 3:4 image). Next I print the image to fit one of two paper sizes: 13x19" or 17x22", leaving a minimum of 3/4" margin for handling and conservation. Since I favour an approximately 2" mat with 1/4" paper showing all around (see Fig. 1), this reduces my needs to four frame sizes and six mat sizes, as follows:
| Ratio & paper | Image size | Mat size | Frame size |
|---|---|---|---|
| 6.7:10 on 13x19 | 10.5x15.5" | 2.0"x2.0" | 15x20" |
| 7:10 on 13x19 | 11.2x16" | 2.15x1.75" | 16x20" |
| 7.5:10 on 13x19 | 11.5x15.3" | 2.0x2.08" | 16x20" |
| 6.7:10 on 17x22 | 13.5x20" | 2"x1.75" | 18x24" |
| 7:10 on 17x22 | 13.5x19.5" | 2.0x2.0" | 18x24" |
| 7.5:10 on 17x22 | 15.5x20.7" | 2.0x2.0" | 20x25" |
Table 3. My print, mat and frame sizes
The two rows in grey are my preferences for 13x19" and 17x22" prints since they involve standard frame sizes and symmetrical mats. Hopefully, the above will spark thoughts that help you with your own approach to the aspect ratio conundrum.