Converting to JPEG for Web Display
Version 1.2, ©2003, 2007 by Dale Cotton, all rights reserved.
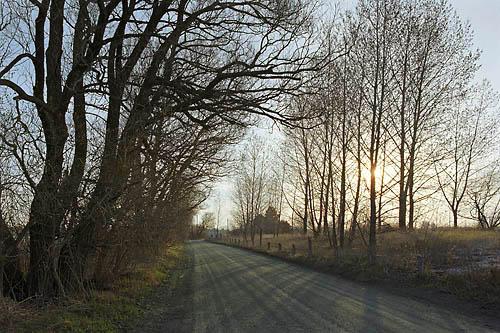
Fig 1. A problematic high-detail image, sharpened: USM 200/0.3/4
The following is my current Photoshop procedure for making JPEGs. Improvements and corrections very much solicited:
- My understanding is that if you use a Mac and have your monitor gamut set to 1.8, you should temporarily change it to 2.2. Only a dwindling number of Mac users use 1.8, and your profile will automatically convert down to 1.8 for them.
- Open final edit of image to be copied.
- Image/Duplicate it and work with duplicate.
- If multiple layers, reduce to one; if alpha channels, delete them.
- Image/Image Size resample down to desired jpeg size (I use Bicubic Softer).

Fig 2. Screen resolution stats for visitors to this site, June 2007
Most people use 1024x768 screen res or larger with maybe 5% using 800x600. I normally size landscape orientation pictures for gallery/album display to 800 pixels width – this fills most of a 1024x768 display and all of a 800x600 display. Images meant for illustrations should usually be smaller – perhaps 400 or 500 pixels width. Portrait orientation images would need to be 700 pixels or shorter in height to accomodate 1024x768 screens.
- Convert to sRGB colour space for best colour preservation.
That's assuming your image is in AdobeRGB or larger colour space. sRGB is similar to the gamut of monitors. Most people use Windows, which doesn't support profiles in browsers, so the profile gets stripped away. AdobeRGB gamut can be severely clipped if stripped away, but sRGB gamut isn't.
Down-sampling larger images to the smaller size needed for the web leaves them soft:
- Apply USM as in next three steps:
- Create a duplicate layer.
- USM Amount = 350, Radius = 0.2, Threshold = 4 is my starting point. Increase Amount if the image looks blurry, decrease if too much haloing (white outlines). If still blurry at Amount = 500, increase Radius to next tenth and/or decrease Threshold.
Although it's a nuisance I perform these adjustments with my monitor set to 1024x768 res, so I'm seeing what the typical user sees.
- If the USM leaves just a small amount of haloing, erase it with the history brush set to the history state just before sharpening.
- Convert to JPEG at a medium compression level; I don't like to go below Photoshop's level 7. (I no longer bother using Photoshop's Save for Web but many do.)
My file-size targets are 150 KB for 800x600 album/gallery pix, and roughly 75 KB for illustrations. The more compression you apply the more your carefully achieved sharpening will be ravaged, so trade-offs always involve some angst.
If you want to add a simple border:
- Set the Photoshop background colour to whatever you want for the border.
- Open Image/Canvas Size..., set the width and height to some larger number of pixels.