Dale's Rough-n-Ready Photo Book
Version 1.4, © 2007, 2014 by Dale Cotton, all rights reserved.
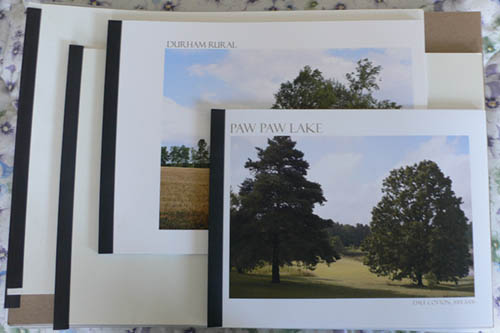
Fig. 1: Photo books in a variety of sizes from 8.5x11" to 13x19"
I suspect that more than a few amateur photographers dream of having a book of their own prints on the family coffee table, so here's my modest contribution to the perennial problem of print presentation. This may seem to be an inferior alternative to commercial vanity press books, such as those from Blurb.com. But such books are very expensive; and the print quality is nothing near as good as what you can do yourself with a decent photo quality inkjet printer at its highest pixel per inch setting.
What you'll need
- 1 package 11" x 1/2" Gemex report cover spine bars, TB11-4, or equivalent
- 1 sheet medium weight cardboard or box board, each at least as large as the prints to be covered. Standard poster board is too thin but works for books that are approx. 11" x 14" and smaller.
- (optional) 1 sheet clear vinyl to protect the front cover.
This is one case where being a hoarder pays off. In many years I've been doing photo printing, I've never thrown out the empty packaging that large sheets of inkjet paper come in. Each such pack of paper has a sheet of cardboard cut to the same size as the paper itself, which works nicely for the back cover. So, if you haven't been saving your packaging, you might want to start. Another usable source might be the white boxes clothes are sold in. Beyond that you'll have to shop around.
Also in my hoard is a package of 13" x 19" heavy-weight clear vinyl photo sleeves. I cut these down to the size of the print, yielding two or more top covers per sleeve. This material needs to be fairly substantial &bdash about the thickness of 300 gsm rag paper. If it's too flimsy it just slides around and bunches up. Alternatively, for 8.5" x 11" books, clear report covers are commonly available in stationery stores.
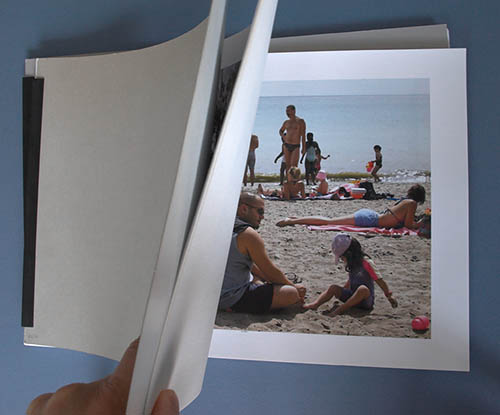
Fig. 2: photo book, open
Procedure
- If necessary, cut the cardboard and vinyl into rectangular pieces the same size as the prints you wish to show. These are your covers. If you don't have the clear vinyl, no problem. You may have to replace the topmost page from time to time as it succumbs to wear. If presentation aesthetics are not an issue, you could also simply use a second piece of cardboard as the top cover.
- Stick up to 20 or 30 prints between them, depending on the weight of the paper you've printed on and the capacity of the spine bar.
- Slip the spine bar over one edge.
- Print a title page on the same size paper as your prints. This shows through the clear vinyl top cover.
- A large page size or too few pages can both cause slippage such that the book does not stay squared up within the spine. If you know the contents of the book are final, you can add a bit of glue to the left edge inside the spine.

Fig. 3: slipping on the spine bar
Ideally, your printed images would be off-centre on the paper, so the left margin is wider than the right margin. But all that's really required is that the left margin be wide enough that the spine clip doesn't hide the left edge of the image area on the print – 1 inch of left margin seems to be the minimum one can get away with, but 2 inches is much better.

Fig. 4: off-centre 13x19" print
Fig. 4 shows what I consider to be an ideal page layout: top, bottom, right margins are roughly equal (in this case 1 inch), while the left margin is generously large (2.5 inches). If you see the book as being the primary form of presentation, off-centre margins make sense. If you see the book as being a temporary form of storage for prints that can also be framed, then normal margins are probably better.
Considerations
This form of presentation even has a significant advantage over fancier portfolios with clear acetate sleeves. Sleeves protect the print but at the expense of introducing reflections and clipping a bit of Dmax (the blackness of your blackest blacks). Viewing a naked print is always superior to viewing the same print behind acetate, glass, or anything else less transparent than air.
Another major advantage is the ease of adding, rearranging, and removing content. If you should ever undertake producing your own "real" book of prints, this is a great way to shuffle your prints until you get just the right mix.
The disadvantage of showing loose prints is the risk of damage due to handling. A sleeveless book/folio doesn't provide as much protection as a sleeved portfolio, but it does provide considerably more protection than simply handling loose prints. To date, I haven't found this to be a problem.
I haven't seen spine bars thicker than 1/2 inch, which puts a 20 or 30 sheet limit on the number of pages per book. This happens to work for me. For years I used Itoya Profolios that hold 48 prints each. I noticed repeatedly that people spend only seconds looking at each image when confronted with that many pictures at a time. Ironically, if someone really likes the pictures, she'll still go through them quickly, then start over to go through them much more slowly. My sense is that 10 to 15 images is a good balance between too few and too many to digest in one sitting.
Still, if you need more than 20 or 30 images per book, use thinner paper stock and/or double-sided stock.
One non-obvious problem I've run into is what looks to be ink leaching from the blank side of one page being pressed against the printed side of the next page. What you see when you hold a page at a certain angle is small scuff marks on the printed surface. This happens over a period of weeks and months. I doubt this would happen with matte-surface paper, but I've had it happen with more than one brand of gloss surfaced paper. Papers with a slick, untextured finish seem more prone to this problem. But I've had it occur with one brand of textured paper, which perhaps was formulated such that the ink stays closer to the surface of the paper. The solution is to leave the printed pages unbound for a full week before assembling. Apparently, this allows for really complete drying. Similarly, I've never attempted to print double-sided, so I don't know whether some similar considerations apply in that case as well.
Think small
I find cutting a 13" x 19" sheet in half yielding 2 sheets 9.5" x 13" makes for a very nice sized photo book. I size the images in landscape orientation to 10.5" width with a right margin of 0.5". Standard letter-size (8.5" x 11") paper works nicely too, with an image width of 9". 11" x 14" (if you can find it) and the US standard 11" x 17" also work very well but require 1/2" spine bars to keep the pages from slipping.
Of course, the above is assuming a sufficiently large printer. I've never worked with the most common printer size, limited to 8.5" as the maximum width. In that case I would look at one of the rare papers available in 8.5x14" size and cut that to something slightly shorter. Or look for an even larger sheet size that could be cut into more than one piece of the desired dimensions with minimal waste. For example, a sheet of the now-common 13x19" paper can be cut into two 8.5x13" sheets with a wasted 2" strip. Then each of those could further be cut down to 8.5x12.5", if desired.
Mixed orientations
Nearly all my pictures are in landscape orientation (a choice I happily fell into very early on). Equally, if nearly all my output were in portrait orientation, I would simply make my books with the spine on the long side. It's when you're working with a mix of both orientations that you have a problem. The rare solution is to divide the pictures into two books, one for each orientation. But when both are in the same book, you can
- Use the orientation for which you have the greater number of pictures, then size those in the opposite orientation to the maximum acceptable height of your chosen paper size. For example, you're printing on 11x17" paper with the spine on the short side, and your pictures are mainly in the 2x3 aspect ratio of a typical dSLR camera. You print your landscape orientation pictures sized to 12.5x8.5". But your fewer portrait orientation pictures you print at 6.6x10", leaving only 1/2" margins top and bottom.
- Print the pictures to optimally fill the page size, requiring the viewer to rotate the book to view any image in the orientation opposite that defined by the spine. Using the same scenario as above, you print landscape orientation pictures at 12.5x8.5" and portrait orientation pictures at 8.5x12.5".
- Use an almost square paper size, pretty much wasting the same amount of space on each page for both picture orientations. This further tends to result in all pictures being small. For example, if your page size is 11"x11", your pictures might be 6x9"for landscape and 9x6" for portrait.
Pick your poison. The same compromises also apply to most any other form of presentation – from screen, to boxed set, to sleeved portfolio – and even makes a framed-and-hung presentation that much more difficult to arrange,
Getting fancy
Besides a printed title plate with or without a picture pasted on to the front cover, you can also add pages of text, such as an introduction, and/or print text below or beside the image on any page.
Mat board would make elegant covers; the issue is that it's too stiff to allow the book to be opened. If I wanted to try using mat board, after I'd cut the board to the size of the prints, I'd then cut a 1/2 inch strip from the left edge then use cloth tape to re-attach the strip to the main part of the board. This should act as a hinge.