Eradicating Blown Highlights in Photoshop
Page 1, version 1.0, © 2008 by Dale Cotton, all rights reserved.

Fig. 1: Blown highlights (click to download full size version)
Sometimes the dynamic range of a scene exceeds that of our camera, no matter how carefully we expose. In Fig. 1 the ugly white patch of clouds on the right results from the sun being directly behind it, and could well be considered as specular glare. Specular or no, if this were part of an image that was otherwise a keeper, it would have to go. I'm sure too many otherwise great shots languish on photographer's hard drives simply because the photographer doesn't know the techniques needed to save them.
Example 1 &ndash blown clouds &ndash technique 1
To follow along: right-click on Fig. 1, download the full scale image, then open it in Photoshop (most any version will do):
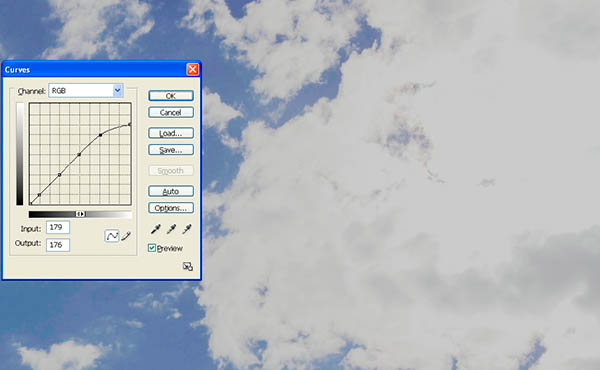
Fig. 2: Curve to clip blown highlights
1. Open the curves dialogue, click on the darkest part of the clouds, then click where that point falls on the curve to create a lock-down point.
2. Create a few more lock-downs below that one to keep the bottom of the curve from skewing.
3. Drag the top right end of the "curve" line down. This clips the highlights. I've clipped fairly extremely; you can go anywhere north of that you like.
In cases in which the blown area is fairly small this may be all you'll need to do. No such luck here. [An alternate approach to these first three steps is to use the combination of eye dropper and paint bucket tools, as demonstrated in Example 2.]
4. Close the Curves dialogue then create a history brush point on whatever history state came just before the curve.
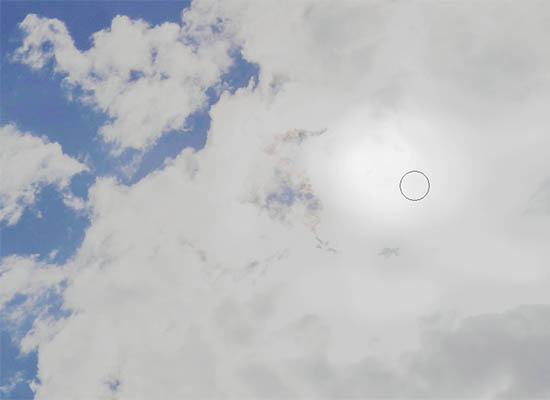
Fig. 3: Early stages of history brush work
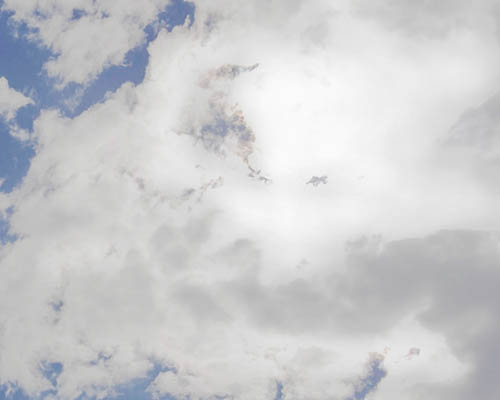
Fig. 4: More history brush work
5. Using the history brush set to some low opacity like 10% and fairly large width like 45, undo the clipping in the areas furthest away from the original dark areas of the cloud. Start where the sun must be (see Fig. 3) and work a circular area at that point back to full blown brightness while expanding your history brush region with each pass. If you make a move you don't like, simply use the Ctrl+Z normal undo to get rid of it. I often work at high magnifications like 200% and 300%.
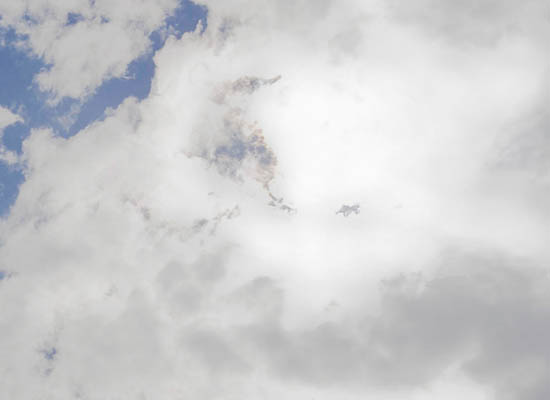
Fig. 5: Using the rubber stamp AKA clone tool
6. At any point switch to the clone tool, set the opacity to low and brush width fairly large, choose a source point in the dark regions of the clouds, then click along the edge between the dark area and the light area. Move along that border to lessen the transition. You've spent a life time observing clouds (whether on purpose or not); so trust your eye to tell you if anything you do is not believable – simply undo that stroke and try again.

Fig. 6: Final result
7. Switch back and forth between history brush and clone stamp as desired until you have a believable shading throughout the previously blown region.
Example 1 &ndash blown clouds &ndash technique 2
Another approach to the same problem is to use only the rubber stamp tool:
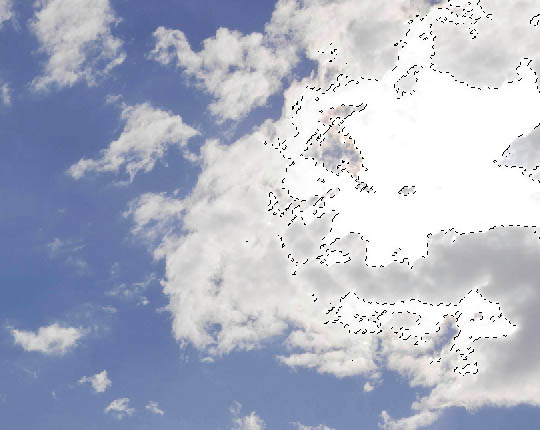
Fig. 7: Select Color Range
1. Open the original image, open the Select->Color Range... dialogue, set the fuzziness to approx. 25, click on any blown highlight area, then click OK to close the dialogue. You now have a selection of the the blown areas.

Fig. 8: Cloning in transitions
2. Switch to the rubber stamp tool, set the brush size fairly broad – maybe 65 – with soft edges and opacity around 20. Sample from the dark areas outside the selection and clone into the selection to create transitions from dark to white. Use even lower opacity and/or a smaller brush to blend.
This method can be much quicker than the first but requires that there be something appropriate as a source for rubber stamping, which is not always the case.