Colour 102: Coping with colour casts
Page 2 of 3. Version 1.1, ©2012 by Dale Cotton, all rights reserved.
Learning to correct colour casts
Concept
To create the colour cast samples in Fig. 2 and Fig. 3 in the previous section I started with the initial neutral colours version of the image open in Photoshop, then opened the Levels tool, then switched to the appropriate colour channel within the Levels tool.
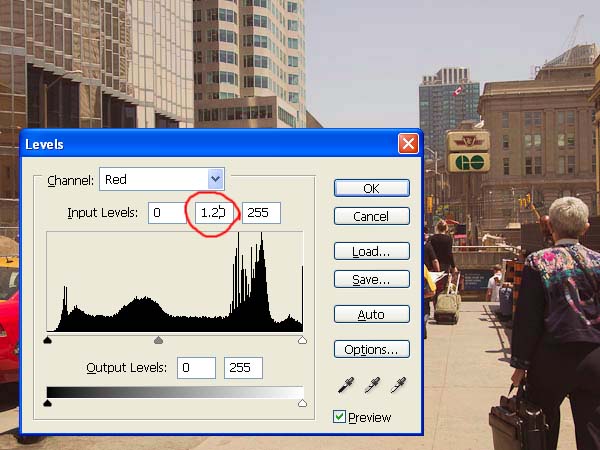
Fig. 4: applying a red cast using the Photoshop Levels dialogue
You can see this in progress from the screen shot in Fig. 4, which happens to be from the creation of a red channel example. Having switched to the red channel from the upper channel selection box, I then changed the middle slider input number from the default of 1.00 to a different value. For the +++ casts I used 1.20, for the ++ casts I used 1.10, and for the + casts I used 1.05. Similarly, for the minus sequence I used 0.80, 0.90, and 0.95.
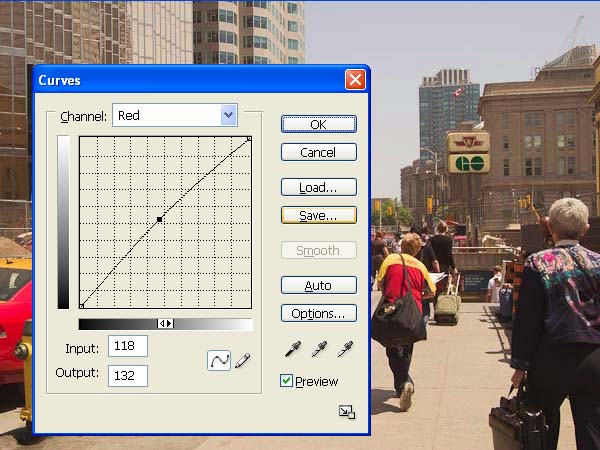
Fig. 5: applying a red cast using the Photoshop Curves dialogue
I could have accomplished the same thing using the appropriate colour channel in the Curves dialogue, except being lazy I preferred typing in one number per cast rather than two. Nevertheless, to correct a cast I always reach for the Curves tool. Fig. 5 shows the simplest case of introducing a cast using a single point curve, starting from the centre, which seems to pretty much replicate a Levels change. It would be very nice for the world to arrange things such that the only casts I have to deal with were single point curves, but such isn't always the case (at least in the world of film scanning).

Fig. 6: applying a complex cast using the Photoshop Curves dialogue
All of which is to say that the first two tools in the colour cast correction toolkit are Levels and Curves. The previous Learning to identify section of the tutorial will hopefully sensitize you to the difference between a colour-neutral image and the presence of a colour cast in an image. Even if you can't decide whether you're seeing too much magenta or too much red, for example, so long as you can see that something's out of whack, then you can open the Levels dialogue, push the centre slider left and right in each colour channel, and if you hit on a voilà position, simply click OK to accept that change. If not, go on to Curves then experiment with two-point S curves in the colour channels.
The idea for this tutorial came to mind as I laboured to scan boxes of family slides from the 1970s. Even though they had been properly stored, the chemical composition of the dye layers in the slides were in various stages of self-destruction. The red dyes had gone berserk. They were over-saturated in the darker values and even more bizarrely were de-saturated in the lighter values. The blue and green channels had both decayed but by different amounts and by different amounts from the light to dark regions within a given slide and to a uniquely different amount from one slide to the next. The scanning software has a complex and sophisticated interface, but not complex enough to offer me multi-point curve corrections in separate channels for both luminance and saturation. Thus, each scan had to be opened in Photoshop then individually tweaked to compensate for these degradations.
Since the photographer didn't kindly include a Gretag Macbeth Color Checker card in each frame, or even a neutral grey or white card, I had no absolute referent to work from, and often couldn't even determine what the ballpark colour temperature should be. I used to pride myself on having a good eye for colour, but this was a challenge I rarely felt the equal of. Getting a believable skin tone out of such conditions was too often beyond my newly-humbled talents.
You'd think that when dealing with digitally captured images we could put all that behind us, but such is far from the case. Given the vagaries of mixed lighting and the tweaks digital camera manufacturers deliberately introduce into their JPEGs to satisfy customer demand for "punch" and "pleasing" colour, even just getting a realistic skin tone out of a JPEG is too often a herculean challenge. Nevertheless, let's have a go:
Example 1
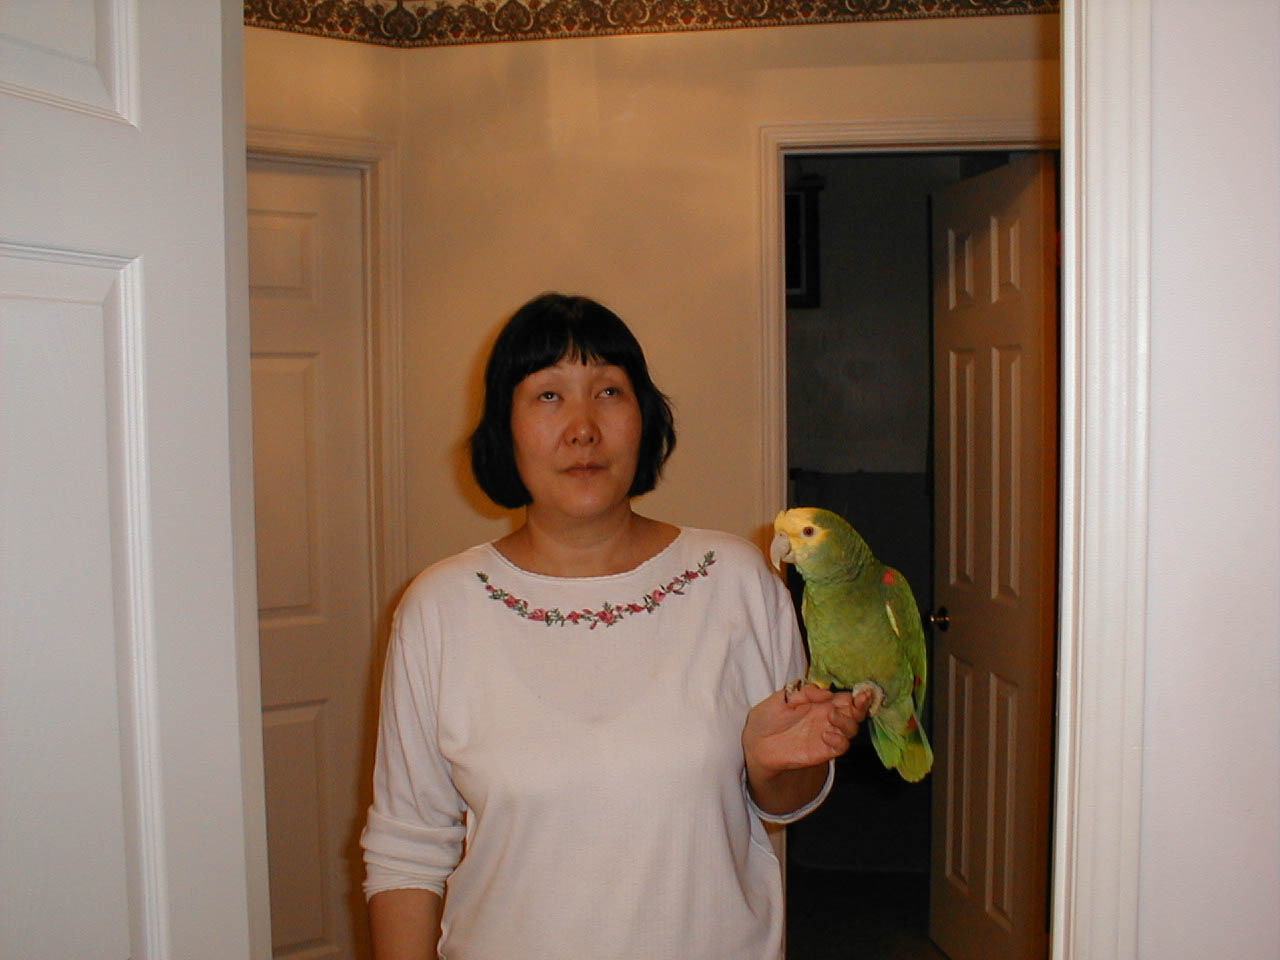
Fig. 7: Uncorrected snap shot (click for larger version)
Fig. 7 is an out-of-camera snapshot taken with an Olympus point&shoot in 2000. The automatic white balance even back then has worked a marvel in nicely handling what looks to be mixed lighting. We can see the tungsten-ness of the light in the recess in which the woman with parrot is standing. Nevertheless, the camera's white balance setting is but one solution to the problem. It looks to me to be a compromise such that none of the whites are neutral. The door on the left, for example, is clearly painted white but is in fact some sort of vaguely pinkish colour. As we can see from the picture, Tungsten light is orangish. Since orange is a mixture of red and yellow, with red being controlled by the red channel and yellow being controlled by the blue channel, we can be on the lookout for corrections to reduce red and/or add blue as one possibility to explore.
So with two clues pointing us to the red channel, let's open Levels, switch to the red channel, and drag the middle slider to the left a bit to see what effect reducing red has:
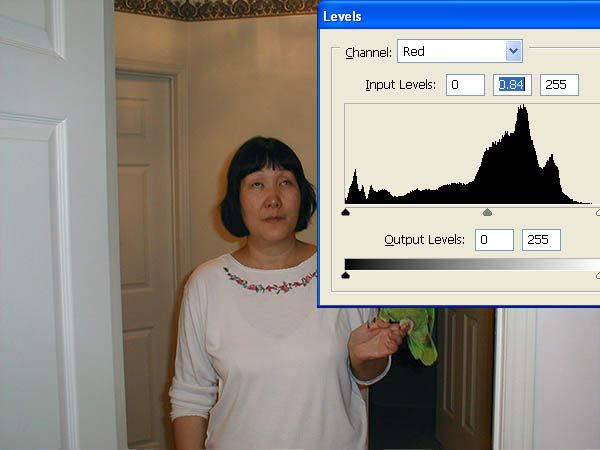
Fig. 8: Reducing red
Fig. 8 shows a dramatically more neutral white in the door, so reducing red looks good.
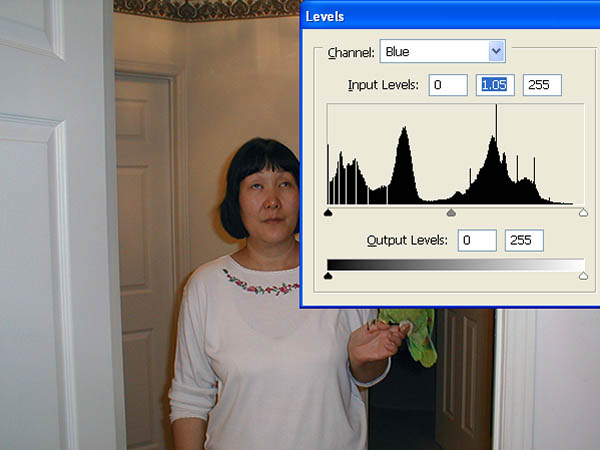
Fig. 9: Adding blue
There's also the idea of adding blue, and arguably just a dab of +blue makes a further improvement – or perhaps I've just convinced myself that that's the case...
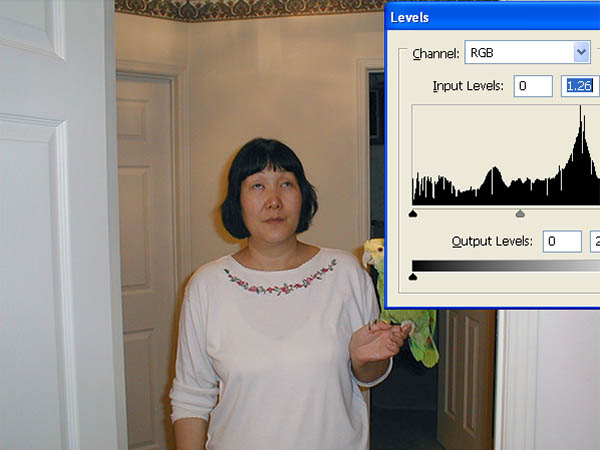
Fig. 10: Adding brightness
In any case, the red channel has been reduced more than the blue channel has been increased, resulting in a net darkening of the image. So we go back into Levels and this time bump up the RGB composite "channel", which has the effect of a net brightening, which I've done to taste. Fig. 11 shows the result:

Fig. 11: Result
So even a seeming very simple cast that could be corrected entirely in Levels nevertheless took us into new territory: correcting for casts in two different channels in the same picture.
* * *
I just wrote that I made the brightening adjustment "to taste". In fact, all three adjustments were to taste, i.e. pure judgment calls. Short of hopping into a time machine then going back to the year 2000 to take a colorimeter reading from the white door or something else in the scene, we have no way to determine exactly what shade of white we're dealing with in this particular scene, and again we rarely have any such reference point in any other scene.
As you followed along working through this exercise on your own computer, you probably felt at sea. "OK. So Dale reduced the red channel to .84 and increased the blue channel to 1.05, but when I try it one time I'm positive it should be 0.86 and 1.03 and the next time I'm positive it should be 0.82 and 1.07." Exactly. Psychologists tell us that sanity is the ability to live with uncertainty. You'll use up great heaps of sanity by doing colour correction work, so best lay in a generous supply right from the get-go... ;)
Perhaps more helpfully, what we're doing when colour correcting is not and in most cases cannot be re-creating the actual scene. Instead, all we can do is make our best effort to create a believable scene. Once you experience that anti-epiphany, I suspect you'll find it actually becomes a bit of fun to roll up one's sleeves and muck around in the finger paint world of colour sliders.