Digital Editing 101
Following an Art Photograph from Capture to Print-Readiness
Page 2, version 1.3, © 2006 by Dale Cotton, all rights reserved.
Editing
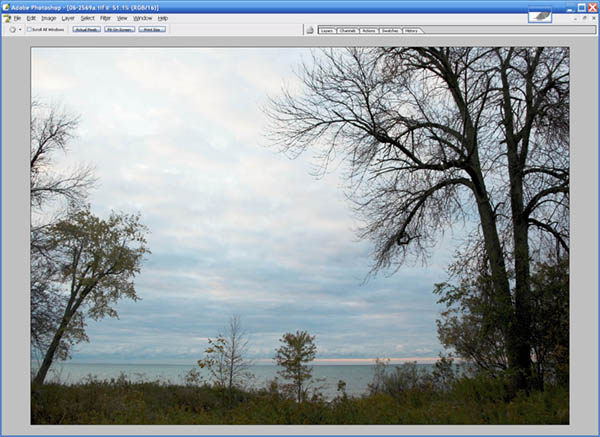
Fig. 3: Opened in Photoshop
Now we're in Photoshop where we can see the image at a larger size and get a better read on what's going on. A further curve will open the dark foreground without compromising the sky:
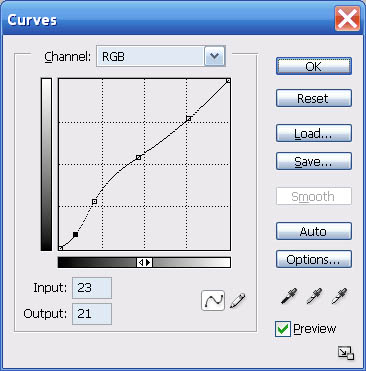
Fig. 4: Initial contrast curve
A second curve applied just to the blue channel, neutralizes the effect of the blue cast on the foreground vegetation:
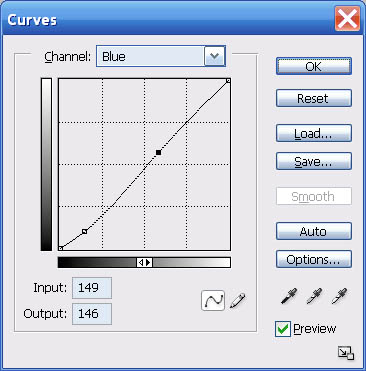
Fig. 5: Blue cast curve
Creating curves is one of the most valuable skills you can acquire. Your computer needs to be fast enough that you can leave preview on and watch any changes you make in real time. Here is where you get to be a master chef instead of a rote recipe follower. The master chef seasons to taste and the master image editor creates curves that bring an image alive. There are three basic rules: 1) introduce no abrupt changes (kinks) in your curve; 2) never raise a point at the left side of the curve higher than any point to its right; and 3) the more radical the curve the more important it is to work in 16-bit mode. For more information, see Photoshop Curves 102.
I now inspect the foreground at actual pixels because I'm concerned whether there is enough contrast in the shoreline undergrowth. Looks OK, but if not I would have used LCE or a further curve tweaked at the shadow end to increase the contrast.
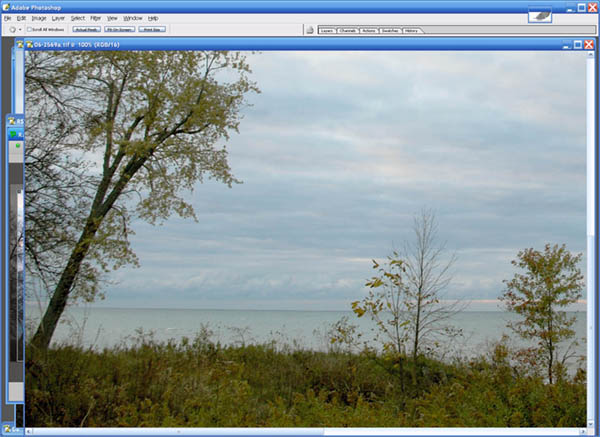
Fig. 6: Foreground inspection at actual pixels
That about does it for anything I can do as a global edit. Past time to do a Save As... into the PSD file format.
I'm already pretty happy with the sky and water, but suspect there's a lot more I can do with the foreground. So I use Select->Color Range... to select the sky, then invert, leaving me with just the foreground selected.

Fig. 7: Select Color Range dialogue
Tip: save yourself some grief – avoid trying to change contrast of sky vs non-sky in a picture with tree branches like this one has using a non-feathered selection such as this.
Note that in Photoshop CS and later I could use the Replace Color... dialogue to combine the Select All with the Hue/Sat. Either gets you to exactly the same place.