Matting and Framing Crash Course
Page 2, Version 5.2, ©2002-2005 by Dale Cotton, all rights reserved.
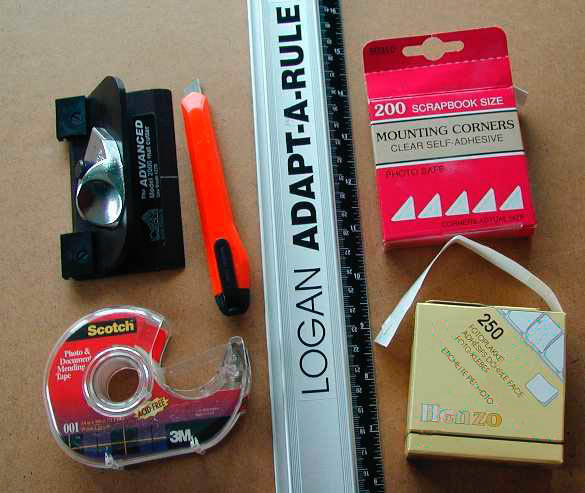
Fig. 2: A typical collection of framing supplies
Tools and Supplies
An important pre-requisite is access to a good arts and crafts store both for the initial tools and for the consumables you'll need for each framing session, such as mat board, backmat, and frames.
Here's your shopping list:
One-time purchases (art store)
- Bare minimum: Logan Graphic model 2000 mat cutter, or equivalent, plus the required Logan Graphic 24" Adapt-a-Rule
- Much better: board-mounted mat cutter - more expensive but is far more likely to give you crisp square corners, as well as having presets to expedite cutting multiple mats to the same measurements (see Adam Nixon's note on page 7).
One-time purchases (hardware store)
- Razor-blade knife
- Needle-nose pliers and wire cutters (if you use wire for hanging)
- Hammer, screwdriver, wall plugs, screws (for hanging)
- 4 foot length of masonite or other work surface
- snug latex or cotton gloves
Consumables (art store)
- Backboard: foamcore (e.g. 20"x30"x3/16") or mat board (e.g. 32"x40"x1/8")
- Overmat: mat board (e.g. 32"x40"x1/8"; see Overmatting, below, on colour choice)
- Wood or metal frame and glass (esp. standard size, such as 11"x14", 16"x20", 18"x24")
You will need some method for securing print to backboard. Some options are:
- Triangular photo (aka mounting) corners (or make your own)
- Henzo adhesive tabs (essentially little rectangles of double-sided tape
- 3M Photo & Document Mending tape (Cat #001)
- 3M Photomount spray adhesive
Consumables (hardware store)
- Windex or equivalent (for cleaning frame glass)
- Wall plugs and screws (for hanging)
I buy sheets of mat board from the local art-and-craft store. I spent quite a bit of money buying the two critical mat-cutting tools, both shown in the Tools photo above. The Logan 2000 mat cutter looks like a small hand plane, but essentially holds a razor at a slant. The Adapt-a-Rule is a metal ruler with a track along one edge in which the mat cutter slides. I'm sure there are other brands, just avoid anything flimsy.
While at the arts-and-crafts store you may notice pre-cut overmats for sale. If you always crop your images to exactly 8" x 10" or 11" x 14", etc., then you can use pre-cut mats. In my experience, most artists dislike having aesthetic decisions made for them.
Note: For the sake of clarity let's work through a specific example from here on. Let's presume I have a print on 13" x 19" (Super B) paper to mount in an 18" x 24" frame. If you do 8" x 10" or 11" x 14" or whatever you simply change the numbers proportionately. Providing three different sets of numbers at every stage will be too confusing to read, let alone to write. Also, many calculations depend on the image size as well as the paper size, and, for me at least, image size varies with each image.