The RX100/2 Meets SAM
And you go to boot camp
Table of contents. Page 2 of 4. Version 1.2, ©2013 by Dale Cotton, all rights reserved.
Hup, two, three, four! Like any good drill sergeant, I'm a mind reader. And my ESP is telling me some of you are about to put off doing the practice assignment you've just read and instead are about to keep on reading. No. Hop to it. How hard is it to stand up, turn on your camera, move about your domicile, and snap a dozen pictures, adjusting the exposure for each one?
Day 2: Working with Apertures in Manual Mode
So far you've presumably been judging whether you've got a good exposure by previewing at the scene on the LCD to see if it's too bright or too dark for what you want. The LCD is too small, too coarse, and too hard to view in many daylight situations to rely on to always reveal smaller problem areas. So the next thing on the agenda is to learn how to use a histogram. Scary stuff. If you already know how to read a histogram, continue with this lesson. Otherwise, please read Appendix B before proceeding.
For the previous exercise, I had you leave the F number (AKA f/stop, AKA aperture) at F5.0. Now it's time to consider when and why you would want to use a different aperture.
Here's one consideration:
Sharpness. The Zeiss-design lens on your RX100/2 is an excellent optic, but like any lens it is better in some parts of its range than others. It's at its sharpest with the least corner softness in the f/4 to f/5.6 range. Going more open or less open within the range of f/2.8 to f/8 causes little or no loss of sharpness, thanks to the automatic software distortion correction built into the camera's JPEG engine and packaged with each raw file. But going beyond either extreme introduces progressively more image softness. And you also lose some sharpness at the extremes of focal length – either the 28mm end or the 100mm end. It's a personal judgment call how important this is to you. If you primarily do web presentation or small prints it may not be important to you at all. Otherwise, it's always a good idea to do a series of controlled test shots of the same scene (a brick wall is good) to see what extremes you'll want to avoid when possible. Of course, use the extremes of both aperture and focal length when you need to in order to get the shot you want. The point is that when you have a choice, avoiding the extremes has the benefit of greater sharpness.
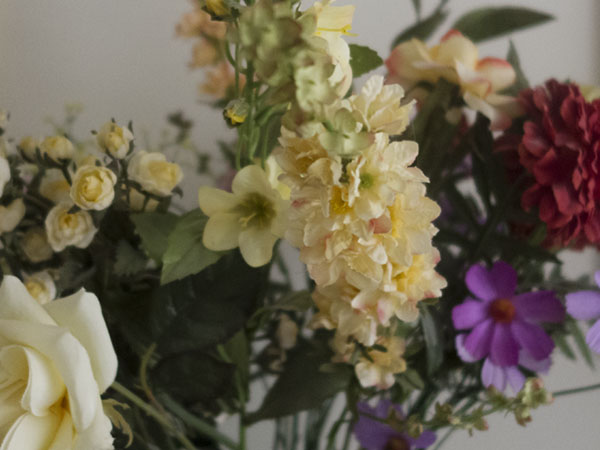
Fig. 12: Shallow DOF (f/1.8)
Depth of field. But beyond zeroing in on optimal sharpness, photographers use aperture to control DOF. You've read the aperture section of Appendix A if you needed to, and know that aperture lets you increase or decrease depth of field (DOF) in exchange for an equivalent hit to shutter speed. While the sensor inside the RX100/2 is a headline item for how large it is, that's only relative to the overall size of the camera. The larger the sensor (or film frame or emulsion-coated glass plate) the shallower the DOF will be, all else being equal. The ability to have only the subject of the picture in sharp focus and everything else in deep blur is an effect that many photographers prize, called selective focus, or shallow DOF. This in not a long suit of the RX100/2 or any other small camera, but you can get selective focus with the RX100/2 to a certain extent, as witness Fig. 12. You can narrow your DOF by going to larger apertures, by getting really close to your subject, and by zooming out to long focal lengths. The first and third of these approaches can push you into a trade-off with sharpness, as described above.
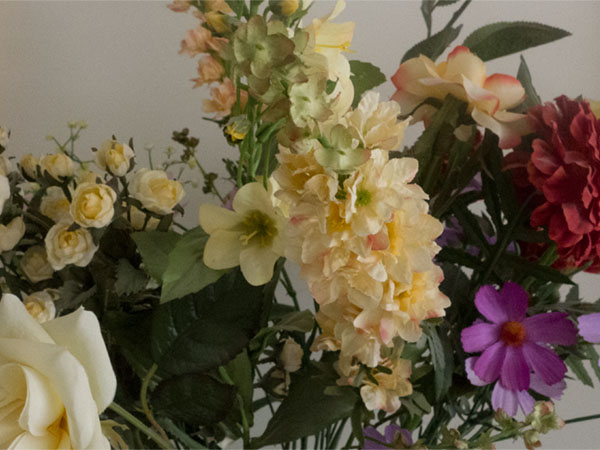
Fig. 13: deeper DOF (f/8)
The opposite approach is to shoot for maximum depth of field, to most nearly have all of the scene from closest to camera to furthest from camera in sharp focus. In this case the relatively small size of the RX100/2's sensor very much works in your favour. You're getting a huge DOF already at f/4 and f/5.6. You'll only need to venture to f/8 in the most extreme cases. And beyond f/8 the softness introduced by something called diffraction wipes out any benefit that might otherwise be gained from yet smaller apertures. (Yes: the camera does have an f/11 setting, but, no: it's not there for DOF emergencies. As we'll see, it's there for situations in which you really need to reduce scene brightness but don't want to, or can't, go any lower in ISO.)
Low light. Finally, another reason to change apertures is to let in more light in low light situations in order both to keep from getting blurry shots due to really slow shutter speeds, and also to keep from getting noisy shots due to really high ISO numbers. In this case you might well open up all the way to f/1.8 and accept the hit to both sharpness and DOF as preferable to camera shake, subject motion blur, or ISO noise. (Or: you may open up because a shallow DOF is how you want the picture to look.)
Why can we only open to f/4.9 at the telephoto end? A lens that has a wide aperture like f/1.8 all the way from moderate wide angle (28mm) to portrait telephoto (100mm), while still covering the full image area of the RX100's largish sensor, has to be so much bigger and heavier that the RX100/2 would no longer be even remotely pocketable. (The widest aperture that a lens can open up to is called the speed of the lens, because the bigger the aperture the shorter the shutter speed you can use to get a given exposure. The RX100/2's lens is fast at the wide angle end and slow at the telephoto end.)
Drill: Okay, Scrub: give me another ten. Take your camera outdoors for a walk-about. The goal is to produce ten pictures with some mix of shallow and deep DOF and with no glaring technical difficulties. Spend half your time working with large apertures as close to f/1.8 as your zoom setting allows, striving for pictures in which only a main subject is fully in focus. Spend the other half, working with apertures in the f/4 to f/8 range, trying to get as much of the depth of each scene in focus as possible. For the purposes of this exercise, you're trying to keep your ISO down and your shutter speed up, so far as you can, given the aperture you're using for a given shot. You'll find it's not easy to judge DOF effects on a 3 inch LCD. You'll need to look at your shots afterward on a larger monitor, learn from the results, then try again next time.
Day 3: Working with Shutter Speeds in Manual Mode
The simplest idea is that every photograph should be tack sharp and therefore the higher your shutter speed (I'm assuming handheld) the less chance you'll introduce blur, either from a moving subject or hand tremor.
When I took my son to the local small airport for a ride in a Cessna top-wing plane for his birthday, naturally I took a camera along to document the occasion. Turns out that a measly 1/60th sec is a good default shutter speed to use for a moving prop plane. Depends on a number of factors, but it's likely to show the blur of the propeller's motion and a bit of the propeller itself. Too much faster than that and you'll get a perfectly sharp, motionless-looking propeller that's distinctly out of place for an airborne vehicle. Similarly, too fast a shutter speed when shooting cars and the highway or race track turns into a peculiar-looking parking lot. No blurred wheels, no motion blur for the cars or background.
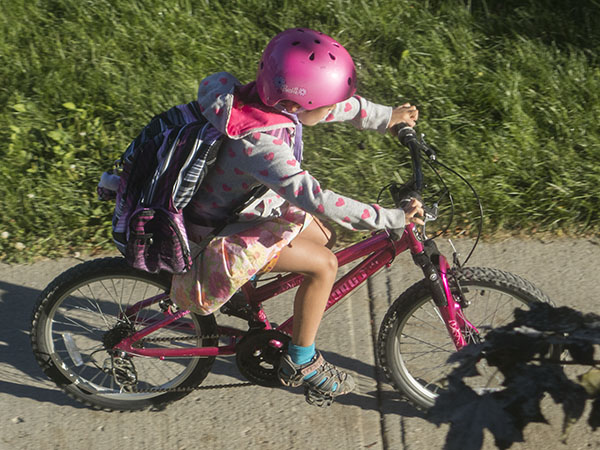
Fig. 14: Girl riding bike. Only sign of motion at 1/800th is slight background blur
In contrast, if I take a picture of a walking pedestrian at 1/60th, the person is likely to show as a blurry mess against a relatively sharp background. Yet if I bump the shutter up to 1/1000th, that will certainly stop the person in his/her tracks, but I may well need to go so high in ISO that I've made a serious trade-off in image quality due to "noise".
Like everything else in photography, choosing a shutter speed is all about juggling trade-offs. The first thing is simply how slow a shutter speed can you use to take a handheld picture of a non-moving subject without having the camera record the micro-tremors of your hands in the form of the whole frame being blurred? This is something you want to experiment with and even practice at, with OSS (image stabilization) enabled or disabled, according to your beliefs in that regard.
Handheld photographers using Leica and similar film cameras (called range finders) took it as a point of pride to take un-blurred pictures at shutter speeds as low as 1/20th or even 1/15th sec – something no SLR user could hope to match. There wasn't such a thing as image stabilization back then. Part of the trick was using a wide angle lens, part was the lack of mirror-box slap in that style camera, part was the heft of the solid metal camera resisting inertia, and part was practice, practice, and more practice. Breathe out as you shoot, have a good stance, press the shutter release as gently as possible.
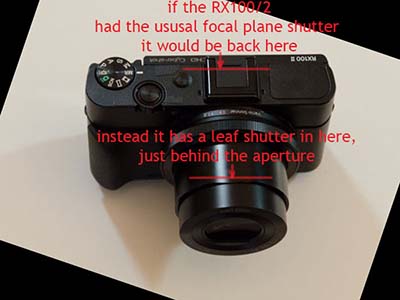
Fig. 15: The RX100 has a leaf shutter in the lens, not a focal plain shutter in the body
The RX100/2 does the Leica not one, but two better, by using a leaf shutter in the lens, instead of a focal plane shutter, just in front of the sensor, and by offering image stabilization. (The leaf shutter also offers virtually silent stealth capability that many a Leica owner would love to have.) It would seem you have no excuse not to shoot at 1/15th sec or so. The gotcha is the effect of focal length. At the 28mm wide end, you might achieve such a number, but the more you zoom to longer focal lengths the more you're magnifying any hand-tremor blur you have. Another time-honored aphorism is to use one over focal length (1/F) as your minimum shutter speed. And in fact that's just what the RX100/2 does when you enable auto ISO. In auto ISO mode (sadly unavailable in manual mode) the camera automatically bumps up to a higher ISO whenever a shutter speed lower than 1/30th at the 28mm end, up to 1/100th at the 100mm end.
Leica macho aside, the only benefit to shooting handheld at slow shutter speeds is to keep sensor noise levels to a minimum. If you find after practice that too many of your shots are unacceptably blurry when working in the 1/F range, and if you prefer sharper to less grainy/noisy, then set your own minimums accordingly.
But of course you won't know what your minimums are unless you practice working at slow shutter speeds, view the results on a monitor, then practice some more.
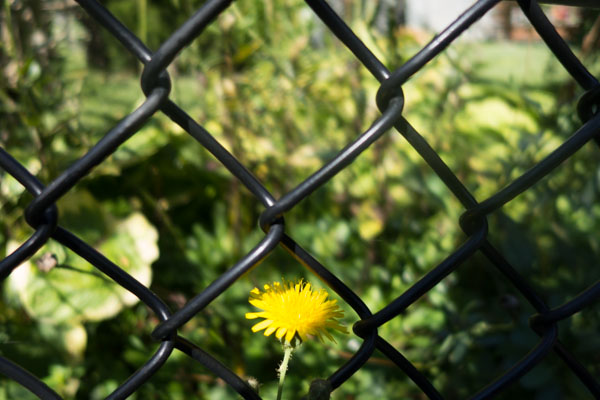
Fig. 16: Bright daylight shot: 1/2000th at f/1.8.
At the other extreme, the 1/2000th upper limit can quickly become a real irritant in bright light situations. Fig. 16 was done at the widest aperture to achieve a shallow DOF. In the bright midday daylight I hit 1/2000th shutter speed at 160 ISO. But if the light is even brighter or you have bright objects in the frame that are going over-exposed, first thing to do is bump your ISO down as low as you feel comfortable going. 160 ISO is actually the ideal ISO for the RX100 Mark 2, because it gives you minimal sensor noise together with maximal dynamic range. Going slower than 160 to the 125 and 100 ISO settings comes at a cost of lower dynamic range. Similarly, 125 is the ideal ISO for the RX100 Mark 1; dropping down to 100 ISO means taking a dynamic range hit. Lower dynamic range means greater likelihood you won't be able to capture both the darkest and the brightest parts of the scene without bunching up the histogram at both ends.
But in many lighting situations maximum dynamic range isn't needed; in that case go right ahead to use those ISOs. Whether or not you do use them, you can still need to drop brightness. In that case, you start pushing up the aperture – happily up to f/8, unhappily up to f/11. If this is a problem that plagues you, another solution is to spring for Sony's filter adapter and a 3-stop neutral density filter. Bit of a hassle, something else to carry and keep track of, but gets the job done.
In general, however you're going to be working within the 1/30th to 1/2000th extremes and choosing your shutter speed according to how much you want to freeze subject motion, from wind in the trees to Sally's ballet recital, to Joey's soccer score. Working in manual mode gives you complete control over this parameter, so get out there and practice, practice, experiment, and practice.
Drill: Today's drill is simply to take ten more technically successful pictures at a variety of shutter speeds with a variety of subject matter, including at least one shot of a subject in motion.
Day 4: Working with ISO Values in Manual Mode
By now you know that ISO numbers higher than base ISO (125 for the Mark 1, 160 for the Mark II) are pure, but occasionally necessary, evil. And we haven't even discussed that the higher the ISO number, not only the more image degradation due to sensor noise, but also the more dynamic range and colour response you've lost.
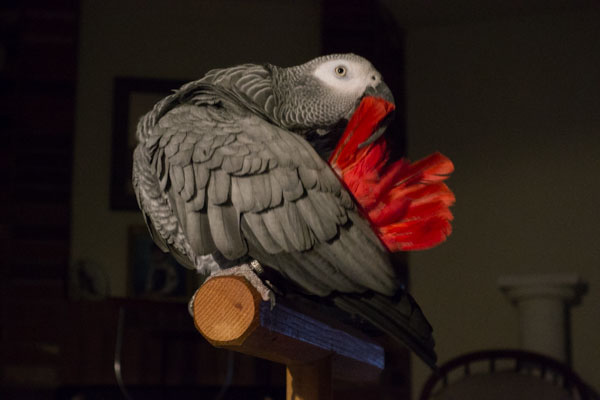
Fig. 17: Mika preening, shot at 6400 ISO
Well, perhaps it's not quite so black-and-white. In many situations those high ISO numbers make the difference between getting any sort of shot or not. A dim church or museum interior, no flash permitted. Sally's ballet recital. Your own night out with the gang at a favourite watering hole.

Fig. 18: Crop of above but with zero noise reduction
Again, the RX100/2's 1 inch sensor currently trumps all other pocketable cameras in low noise, but equally it can't match the noise levels of the larger sensors in recent mirrorless and dSLR cameras. There are dSLRs with lower noise at 800 ISO than the RX100/2 has at 160 ISO (including Sony's RX1/R).
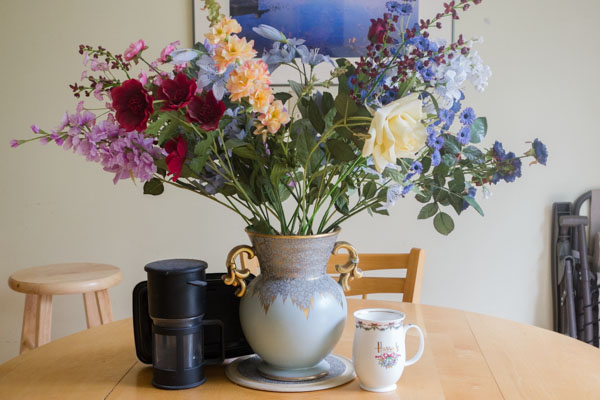
Fig. 19: A make-shift indoor test scene
Drill: That's the theory; time once again to put theory to the test. Set your RX100/2 on a tripod or other support, take advantage of manual mode to eliminate all other variables, now take a series of pictures of exactly the same scene across all the ISO options. An ideal scene might be an indoor room with a range of brightnesses that completely spans the histogram at base ISO and which contains a variety of colours and textures.
Keep the aperture constant, start at 100 ISO, skip 125 and 160, then for each change to a higher ISO number increase the shutter speed by one stop. Note: the shutter speed scale (like the aperture scale, but unlike the ISO scale) is in 1/3 stops, so this means jumping over two consecutive settings and selecting the third. This is relatively easy to double-check, since you want to double the number in each case. For example, you might be going from 200 to 400 by skipping 250 and 320 in between.
Once you have the sequence of pictures, ideally review it on your desktop or large laptop computer monitor using some software program that lets you view at 100% to see the progressive degradation that results from some combination of noise reduction smearing, noise reduction colour loss and false colour areas, and still-visible random-coloured pixels.