The RX100/2 Meets SAM
And you go to boot camp
Table of contents. Page 3 of 4. Version 1.4, ©2013 by Dale Cotton, all rights reserved.
Days 5, 6, and 7: M Mode Tour of Duty
By now you're quite familiar with the mechanics of manually adjusting all three exposure variables. What you need to do now is take dozens of "real world" pictures using this methodology.
Assignment: Presumably, you already have some mechanism for sharing your pictures, whether it be something like Flickr, Facebook, or simply e-mail attachments sent to family and friends, or (heaven forbid!) actual photographic prints. To keep up your motivation during this put-into-practice period, I suggest working toward producing a set of something like ten pictures, all done in manual mode, that aren't just exercises but are ones you can feel proud to show off. Each one will need to be free from technical faults. Plus, each one will need to have something about it that is interesting enough and/or beautiful enough to command the viewer's attention.
Before turning off the camera: As explained in the first lesson, you should already have a memory recall position to allow you to quickly switch to automation to grab an emergency, quick-response shot. But another thing that helps is to leave your M mode settings in a relatively sane state whenever you can predict how you'll next be using your camera. If you expect to be working in low light, leave ISO at maybe 800 or 1600, and aperture at something wider than f/8.
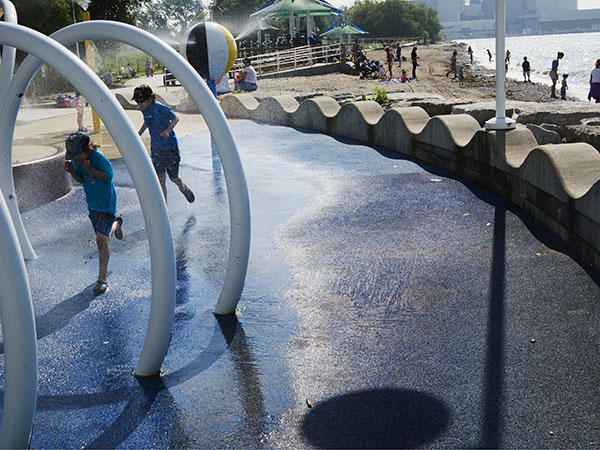
Fig. 20: Boys running at a beach
I'm sure there are whole swaths of photography for which manual mode shooting is counter-productive. If you're doing sports or wildlife and players or critters keep moving from deep shadow to glaring sunlight, like the boys of summer in Fig. 20, this probably isn't the best time to practice your manual mode work.
But, equally, in many contexts you're going to find that you can leave all three settings alone from shot to shot and concentrate on other variables like composition and focus, knowing that no exposure gremlin is lurking in the shadows to spoil your shot. A glance at the histogram is all you need to check that the light hasn't changed.
Your objective is to become so comfortable shooting manual exposure that you never again have any hesitation about switching into it whenever it's appropriate. At that point you'll also have a good feel for which circumstances it's appropriate and for which it's not. For many of us, our list of inappropriate circumstances are very short.
M mode customizations: Since you've got past the point of just learning M mode, feel free to experiment with different control assignments for shutter, aperture, and ISO. Note that, if you prefer to use your lens ring for zoom, focus, or some other non-exposure function, there may not be any better arrangement than what we've been using.
The lens ring, left rear wheel rocker, and right rear wheel rocker can be re-assigned to these functions from the Gear 2 menu. Since I find the lens ring easiest of these to use, I'd prefer to assign it to shutter speed, my most-used function. But each time I turn on the camera the rear wheel defaults to shutter speed, whether or not the lens ring is also assigned there, so not much point in assigning shutter to the lens ring. Likewise, I'd prefer to have the rear wheel default to ISO, since that's my second most-used function, but that's not possible. So I have ISO on the lens ring, let the rear wheel default to aperture, and use the bottom toggle to switch to aperture. I also have Control Ring Display to Off in the Gear 2 menu.

Fig. 21: Auditorium event. Exposure values remained constant for the three-hour duration.
Consider an amateur auditorium event, such as a school play or talent show. In that environment the light level may well stay the same for the entire duration. Getting your ISO, shutter, and aperture optimized before the action starts could well mean that you can ignore exposure for the rest of the shoot. And you'll do so with full confidence that exposure will be one variable that won't result in lost or sub-optimal shots.
Moving on to Semi-Automatic Weapons
I stated at the top that the purpose of learning manual mode was not to become a manual mode convert and turn your nose up at all other modes, but to learn how to use your camera with true understanding. Automation as your servant, rather than your master, can serve a purpose, so it's now time to become familiar with the A and S positions on the mode dial.
Day 8: Working in Aperture Priority Mode

Fig. 22: Crop from an aperture priority shot
When you switch your mode dial to the A position, you're telling the computer in your camera to take over control of shutter speed and leave you in charge of aperture. You can also switch your ISO to the auto setting, telling the camera to handle both shutter and ISO. If so, you can set the minimum and maximum ISO values you want to allow. What you can't set is the minimum shutter speed you want to allow before it jumps to the next ISO increment. Instead (as mentioned above), the camera uses 1/30th as the minimum at wide angle and 1/100th at full tele. If you feel that's on the slow side, at least make sure to turn on image stabilization.
Sometimes the camera's aperture priority automation chooses the exposure I want, as we see in Fig. 22 ... but at least as often it doesn't. Allowing the camera to control shutter speed is really no better than allowing it to control aperture and ISO as well, when it comes to your chances of getting the exposure you want.
If you agree with the camera's exposure logic in all or most circumstances, you're laughing. If not, the idea is that you can set an exposure bias, to tell the camera to always reduce the exposure it wants to use by 1 stop or 2 and a 1/3 stops or whatever. This is based on the wonderful fairy tale that the camera's exposure logic handles all scenarios with a consistent amount of over or under exposure. Now that you've mastered manual exposure and become old friends with the histogram you will quickly come to see just what a joke that is. Hypothetically, you could switch your point of focus from the bride's white dress to the groom's black tux to get two different exposures under exactly the same illumination. In fact, if you're in multimeter mode this shouldn't happen, but it's not that far-fetched.
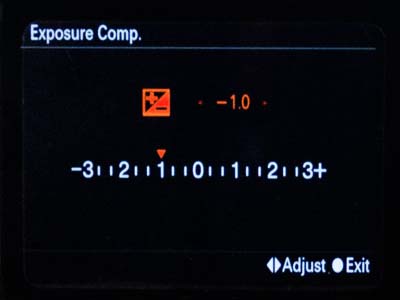
Fig. 23: Exposure compensation display. One stop exposure reduction indicated
Heads up: like auto-ISO, exposure compensation is unavailable in manual mode. Sony's implementation of manual mode is unfortunately very old school.
Enough grousing. Once you're in aperture priority, use the rear control wheel to change aperture as needed. You now have no direct control over shutter speed, so when you need to override the camera on that, press the bottom rocker on the control wheel to pop up the exposure compensation display, then scroll the wheel left or right as needed. Problem is: while you're adjusting exposure comp. the histogram has disappeared and the brightness of the scene doesn't change on the LCD as quickly as you change the exposure comp. value.
Lens ring tip: Here's a tip from Sean Nelson on the DPReview Cybershot forum: set exposure comp. as the function of the lens (control) ring and also turn control ring display to off. Both are on Gear menu page 2. Now you can see both the histogram and the real-time effect of your exposure adjustments while you make them. However, you may find the lens ring works better for small slow adjustments than for large rapid ones.
The upshot is that aperture priority will buy you a certain amount of assistance in rapid light change situations, but you'll forever be checking the histogram, then fussing with the exposure compensation dial to over-ride it's decisions. The real advantage of using the A (and S) mode dial positions is that you now have access to auto ISO.
A partial fix for this problem is AEL, which stands for auto exposure lock. Go into the menu system to the gear sub-menu, page 2. Change the function of either the center, left, or right button to AEL toggle. Now, once you manage to get a good histogram out of exposure comp. or from sheer luck, just press the rocker button you've assigned to AEL. You'll see an asterisk in the bottom right of the LCD. This tells you that the computer will make no further adjustments to the shutter speed until you either press the AEL button again or turn the camera off then back on again.
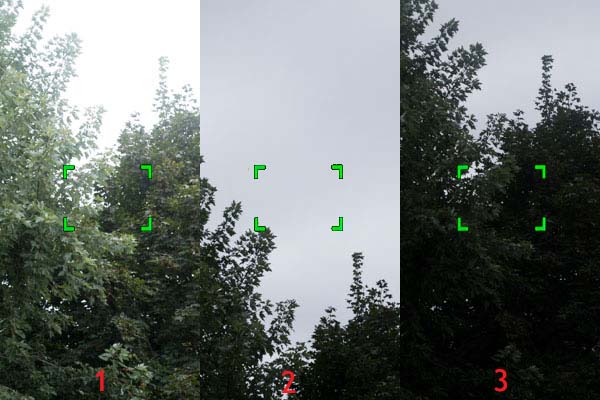
Fig. 24: Using AEL (see below)
AEL tip: One way to use AEL is to not even bother with exposure comp. Instead, point your camera in various directions until you hit on a spot at which the histogram shows you what you want to see. Immediately press the AEL button, then proceed to compose and take your shot or shots, in spite the fact that you may have the camera pointed in an entirely different direction. For example, the left third of Fig. 24 shows how the camera wanted to expose a shot with the focus on the spot indicated. The middle shows me pointing the camera a bit higher where the histogram looks good, then pressing AEL. The right third shows me returning the camera to the same composition to take the shot, but now with a usable exposure.
What about AFL? The best cameras often have buttons to separately lock both exposure (AEL) and focus (AFL). This allows you to pre-set both exposure and focus, then concentrate on getting the composition you want or capturing the instant of action you want. (Clearly, this only works when you can count on your subject staying in the same light and at the same distance from the camera.) The RX100/2 apparently only offers the AEL half of this duo as a dedicated button. Seemingly, all you can do is half-press the shutter button then keep it pressed half way, until you are ready to press it the rest of the way to take the picture. This can be finicky, especially when your attention is on composition, or when waiting for just the right moment to occur. In fact, if you set the centre, left, or right button to AF/MF toggle then press that button, auto focus is toggled on and off, just like an AFL button would do. The one gotcha is that this switches the lens ring from whatever you normally have it at to focus.
Drill: Your experiment-and-practice gig for aperture priority shooting is simply to cover all the above ground. First, you need to establish what the slowest shutter speed you can use handheld is at full wide angle, at full telephoto, and at half-way between the two. This is going to some degree be a matter of practice in that you can get to a slower shutter speed across the board as you become more practiced at handholding.
Next, you need to work with exposure compensation and AEL to settle on a method of changing exposure in aperture priority mode that comes closest to being effortless for you. In the process of that you will be evaluating aperture priority to learn under what circumstances you will use it in future. Presumably, you're already comfortable with manual mode shooting. When does having the options of auto-ISO and auto-shutter actually help, rather than hinder, taking pictures?
Day 9: Working in Shutter Priority
Everything above in the aperture priority section applies to shutter priority, except that you now control shutter speed and the computer now controls aperture. Again you can override the computer using the exposure comp. control. But now exposure comp. modifies aperture if it can, then modifies ISO, if it runs out of aperture.
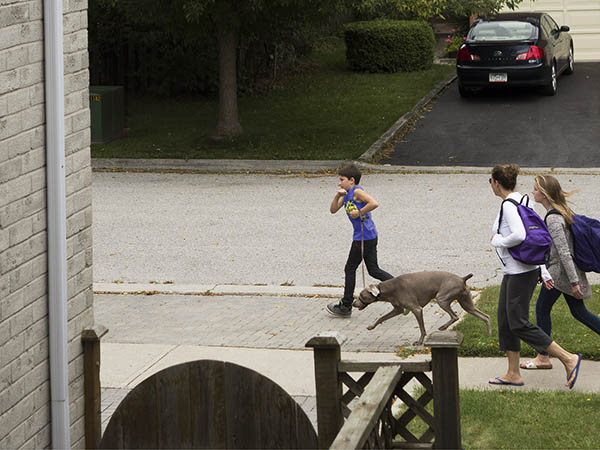
Fig. 25: Shutter priority shot at 1/800th sec.
Fig. 25 is a grab shot taken while practicing making use of the RX100/2's lightning reflexes. I used shutter priority with shutter speed set to 1/800th. Because I also needed full zoom, that left the camera with only ISO to vary in order to maintain exposure. So this shot was taken at 640 ISO even though it was mid afternoon on an overcast day. 1/800th was overkill, not just because it bumped up the ISO, but because a bit of motion blur in boy and dog might have added energy to the picture.
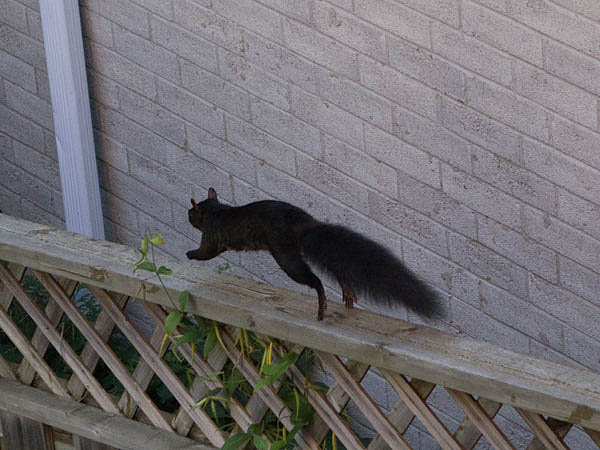
Fig. 26: Shutter priority shot at 1/500th sec (crop).
Fig. 26 was also shot with a short shutter speed, but this time there's a hint of motion blur to enhance the story.
Drill: If you don't have an interest in working with motion, then it doesn't make much sense to spend a lot of time working on shutter priority. Otherwise, you've got a lot to explore. If you want to freeze motion, then what's the slowest shutter speed you can use to do that, and how does it vary with how rapidly your subject is moving? If you want to show that your subject is moving, how to do that? Do you freeze the moving subject but establish the motion due to background blur or vice-versa?
Keeping the camera moving to track the subject is called panning. If you take a picture while panning a moving subject, the subject's motion blur is confined to any parts of the subject that are moving at a different speed, such as the wheels of a car or the legs and arms of a runner. The RX100/2 has an option called tracking autofocus. You might want to explore that, as well.
Day 10: Graduation
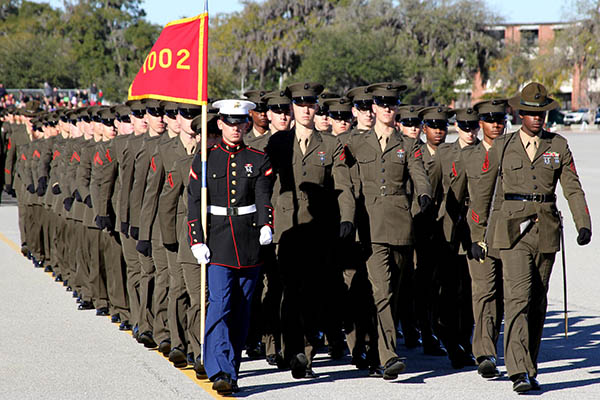
Fig. 27: Parris Island graduation (courtesy Captain Barry Morris, USMC).
If you've got this far by following through with the exercises without cheating by just reading along – congratulations! You are now a certified Old School Photographer with all the bragging rights that entails. This includes the right, ability, and even the obligation to respond to forum questions from poor, automation-deluded photographers with all the long-suffering snideness that your lofty status now warrants.
By the way: I said at the beginning that, having mastered manual mode shooting, you'd be able to go back to the automatic mode dial positions with the knowledge and ability needed to avoid the exposures failures that are all too frequent when using them. What I didn't warn you about is that you're about to discover just how frustratingly incompetent those functions are at getting exposure correct. So you're unlikely to make much use of them henceforward.
Sorry about that... ;)