Scanning & Post-Processing Colour Neg Film
page 1, version 1.1, ©2003, 2004 by Dale Cotton, all rights reserved.
My colour neg film post-processing has changed drastically since I first recorded it less than two years ago. The following procedure is what I'm doing now, at the beginning of 2003.
Update, 2004 ...and, now, a year later, more changes. Ed Hamrick has made significant improvements to VueScan's neg film handling, that greatly simplifies the process of getting good colour from a scan.
Photographers who use the digital darkroom tend to fall into two camps: those who shoot slide film and those who use digital cameras. I am one of the rare exceptions: I shoot 35mm colour neg film - mostly Fuji Reala. "Serious" photographers tend to avoid colour neg film for a number of reasons. First, the orange mask combined with the inverted colours makes it difficult to restore the scene to its original colours. Second, the same mask and inverted colour combination prevent the film itself from serving as a reference to the original scene. Third, colour neg film tends to be difficult to scan cleanly, since scanners are optimized for the greater challenge (to the scanner) of slide film. The reason I bother with neg film is the incredible dynamic range. I can routinely extract eleven full stops from Reala - and boy can I make use of every one of 'em!
Still, getting all those stops off the film, then getting past the colour problems is no trivial task; it's too labour-intensive for most working professionals, who have to produce dozens of finished photographs per day. As an amateur and art photographer I can afford to take the time for whatever pains are necessary to get the results I need. Here's what happens from the moment I get the film back from developing.
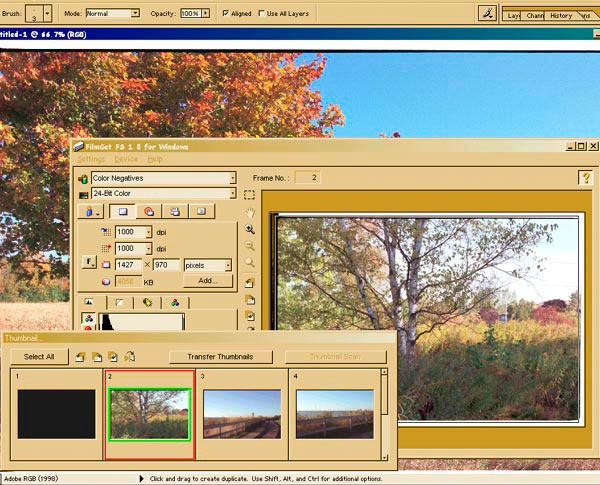
Fig 1. Using FilmGet to make a digital "contact sheet"
Preliminary Scan
The first thing I do is scan the entire roll of film at low resolution.
- 1. Start Photoshop then load FilmGet (the software front-end that comes with my Canonscan FS4000). Scan entire roll of film at 1000 ppi 24-bit, no infrared cleaning.
This takes perhaps half an hour and creates the digital equivalent of a contact sheet for the roll. I find ordering the standard set of 4x6s along with film development is useless: I can't tell anything meaningful about a picture by looking at the machine-processed print. I use FilmGet here instead of VueScan because FilmGet happens to be faster. I just want a rough idea of what each frame looks like, but an added advantage of this step is that the JPEGs I create can be used for e-mail or on-line if needed.
- 2. Close FilmGet. Return to Photoshop. Apply a rough Curves correction to each frame to remove the standard issue purple colour cast, then save.
I have a few Photoshop curves that I've previously saved that I can quickly open and apply to get a rough colour cast removal.
- 3. After the roll is scanned, I go back through the JPEGs to find an image that appears to be worth post-processing.
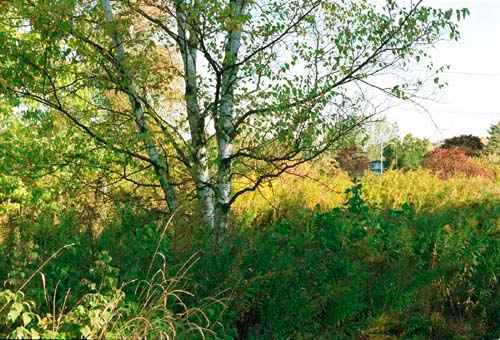
Fig 2. 137-02
In this case I decide that 137-02 looks promising. But pipe the white sky. FilmGet has kindly set a generous white point for me, which just happens to trash the blue sky. Looking at the neg I see that the sky region is not pure black, so I know colour is there. Too bad the guys at Canon weren't so dilligent (well, at least they got the hardware right!). FilmGet seems to be trying to perform a generic processing that is supposed to work on all neg brands and is supposed to yield results that match the results of mini-lab printing.