Scanning & Post-Processing Colour Neg Film
page 3, version 1.1, ©2003, 2004 by Dale Cotton, all rights reserved.
Photoshop, 16-Bit Work
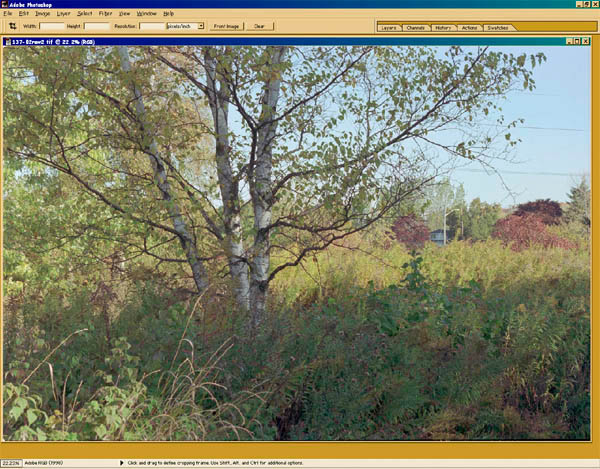
Fig 5. The VueScan final scan opened in Photoshop
The 16-bit TIFF file for this image, scanned at 4000 ppi, is 125 megabytes and 5776 by 3787 pixels, making it a very good match for printing on Epson's 13" x 19" paper size. Perhaps just a few small adjustments to make before it's ready for that, however... ;)
- 8. After opening the scan file in Photoshop, crop away (or clone in) any black or white unexposed film edges you may have missed in VueScan.
- 9. Check at 100% mag. whether noise (esp. sky and shadows) and scratches are acceptable:
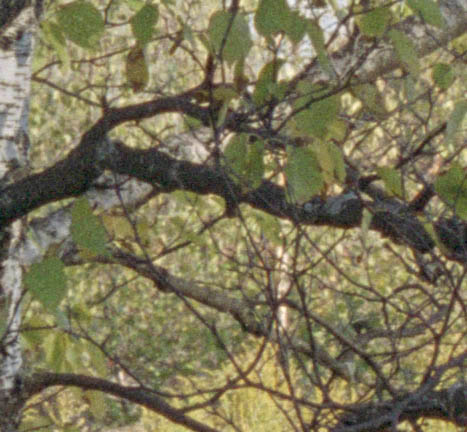
Fig 6. Checking scan quality
Tips: In almost any dialogue or when using most editing tools you can hold down the spacebar to temporarily get the hand tool for panning (thanks, Andy!). You can also use Ctrl+PgUp and Ctrl+PgDn to pan left and right.
If the noise or the amount of scratching are too bad then you may want to return to VueScan to apply a stronger level of IR cleaning and/or Grain Removal.
- 10. Use the brightness (RGB) "channel" in the Curves dialogue to adjust the image's contrast to whatever makes you happy:
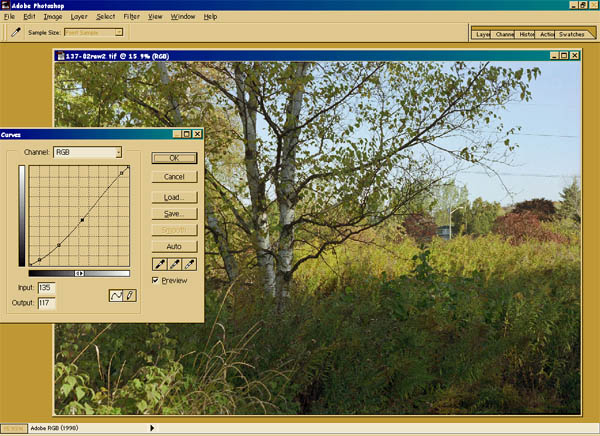
Fig 8. Adjusting contrast
Note:It is this step that is most likely to degrade your image in 24-bit mode. Changing the curve by any significant amount expands some portions of the historgram and squeezes others together. When you only have 256 steps from black to white, such distortions can create visible degradation to your image.
- 11. If desired or necessary, use Photoshop's Hue/Saturation dialogue to tweak the saturation of the entire image. In this image I goosed the Red and Yellow saturations up a tad to compensate for Reala's weak yellows and reds:
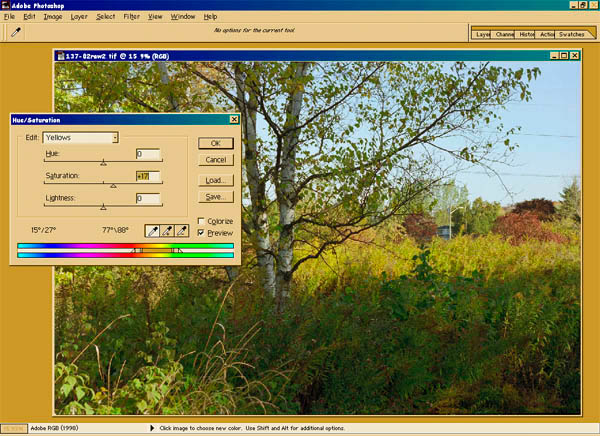
Fig 9. Adjusting saturation (Velvia, anyone?)
- 12. Spot the image at 200% to remove scratches & specks that VueScan missed, the black edges of film, and foreign objects such as phone wires:
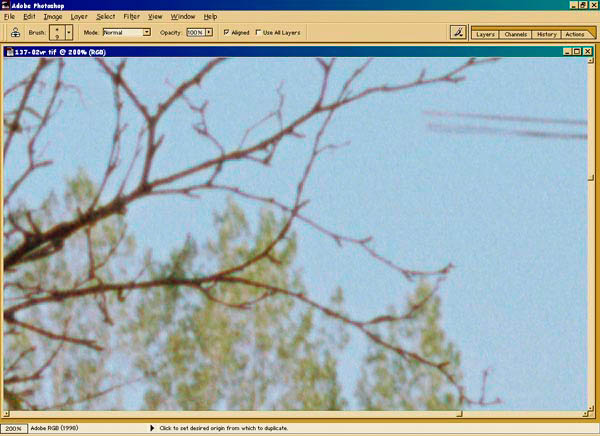
Fig 10. Disconnecting phone service for outlying customers