Scanning & Post-Processing Colour Neg Film
page 4, version 1.2, ©2003, 2004 by Dale Cotton, all rights reserved.
Photoshop, 8-Bit Work
Update, 2010: When I wrote this many of the tools in Photoshop ver. 6 did not work in 16-bit mode. Now that later versions of Photoshop do support 16-bit it is no longer necessary or desirable to drop down to 8-bit mode. Simply ignore that step.
Everything that can easily be done in 16-bit has now been done. The important thing is that all the big colour adjustments have been done in 16-bit mode with it's relative freedom from cumulative error.
- 13. Convert to 8-bit.
- 14. Use File->File Info to record location, film type, copyright, etc.
- 15. Use File->Save As to save the 8-bit version as a new file.
Using Save As rather than Save leaves the original raw scan intact in case of editing disaster.
- 16. At 200% use the separate RGB channels to check for noise. Use Filter->Noise->Despeckle or NeatImage, if Despeckle doesn't cut it.
Noise: The amount of noise in an image has to do with the ISO of the film used together with the thinness of the negative. In general the clearer (oranger) areas of the negative will show more noise in the scan file because the dye clouds are fewer and farther between.
Noise removal: Using Despeckle in one or two individual channels is less destructive than applying it globally. I find the Median and Dust & Scratches filters too destructive. If the noise problem is confined to the sky or water or other fairly edgeless area, I create a selection for that area then use a mild Gaussian blur. If the noise is serious enough, I'll switch to NeatImage. In NeatImage I work on a copy of the image saved from Photoshop, then after NeatImage is done I switch back to Photoshop, open the copy, then drag it on to the original image as a new layer.
- 17. Selective colour adjustment.
Now that we're in 8-bit mode we can use Photoshop's selection tools, including Select Color Range, to define any region or regions that share a colour deficiency. Once you've made your selection, use Curves or Hue/Sat. to correct the problem. In this image the only problems that still bothered me were the sunlit band of field behind the birch trees to the right and the orange leaves directly behind and to the left of the birch trees. I used Select Color Range to grab those areas, then used a combination of colour channel Curves and Hue/Sat. to turn the sunlit field more yellow and the orange leaves more orange. This is a fall scene and Reala was trying to rob me of the warm colours I'd impatiently waited months to capture. ;)
(For more on selective colour adjustment see Maximizing Colour during Post-Scan Editing. Notice that the first part of that tutorial describes a laborious procedure for combining two scans to recoop the dynamic range of the original frame. You can skip all that in most cases thanks to the VueScan's long exposure pass.)
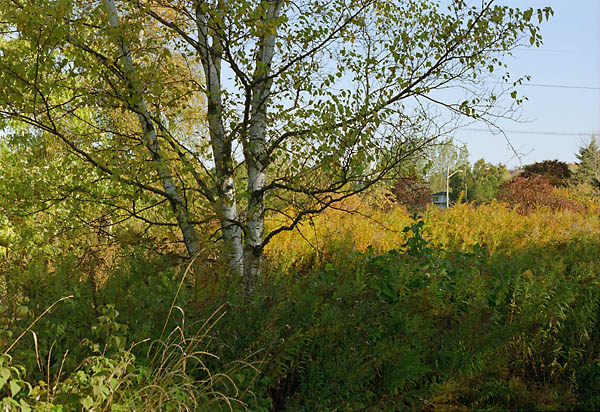
Fig 11. After selective colour adjustment
Note: Selections destined for colour and esp. for brightness adjustment often need to be feathered to let them blend in with their neighbours. But no amount of feathering will rescue too strong a change in brightness to a selected area. Also: I find I often have to select the sky to separately remove casts in it and/or in the non-sky portions of the image.
...And from here on it's smooth sailing! Sharpen, save, and print - you know the drill.