Digital Editing 102: Making it Sing
Project 2: pallet power
page 5, version 1.2, © 2009 by Dale Cotton, all rights reserved.

Fig. 1. Duffins Creek Marsh 5073, unedited raw
For this project I selected a rather similar frame from the same shoot. In fact the time stamp tells me it was shot just 24 minutes later than the frame we used in the first project. If you look at Fig. 1 for a bit you may notice more than a superficial similarity between the central tree in this frame compared to the central tree in the picture we used in the previous project. In fact, if we zoom in on this frame to 100% mag. we'll see the same yellow pipe at the foot of the same foot path:
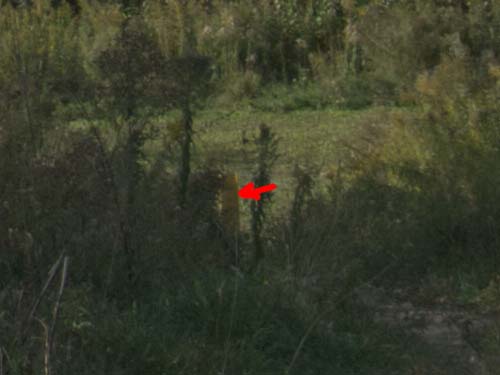
Fig. 2: Crop from Fig. 1
So Fig. 1 is the same scene as in the first project, but this time seen from behind. However, this second frame is mostly in shadow, giving it a different mood, we'll take advantage of that as an excuse to go off in a very different direction.
A. Raw conversion and global changes
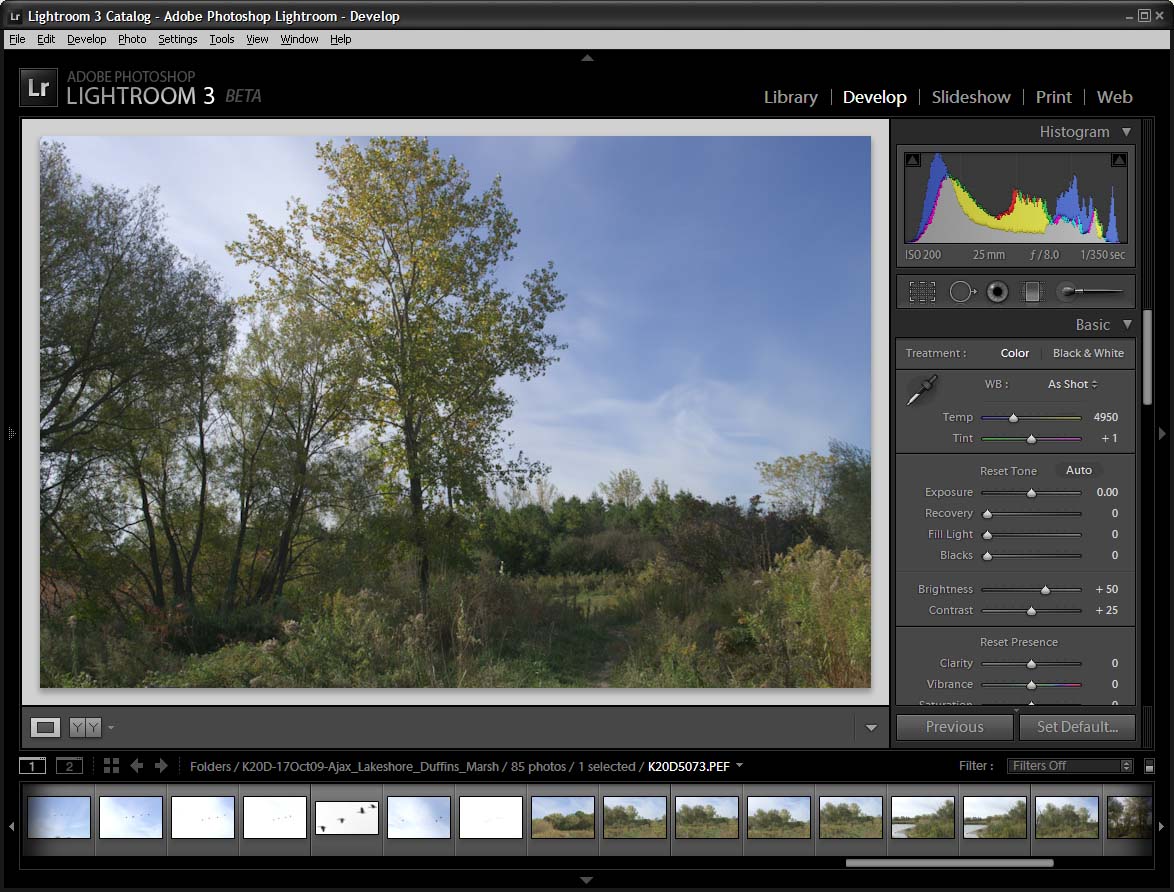
Fig. 3: Lightroom 3 beta
1. Open in your raw converter, examine for unrecoverable issues like mis-focus and blown exposure.
2. Change Temperature from 4950K to 5100K. Again, this is to correct for the blueness of a blue-sky-lit scene.
3. No need to change exposure or recover highlights, since the all pixels fall within the scope of the histogram.
4. Set black point to 1 to remove the slight gap on the left.
5. Increase Brightness from 50 to 75. This gives us some room to maneuver for the next step.
6. Using the ToneCurve sliders: set Darks to -10, Shadows to -6, and Highlights to +22. The scene already has significant contrast from the shadows on the left to the big blotch of sunlit cloud top left.
7. Using the HSL (hue/saturation/luminance) sliders, change the blue hue to +15. This compensates for the slight yellowing of the sky caused by the warming temperature change in step 2.
The next three steps continue with the HSL tool. By the time I took this picture the local time was 10:41 AM. Because the sun never gets particularly high in the sky after the autumn equinox, there are still plenty of long shadows, but even though we've already got the colour human-eye accurate for 11 AM, the result is still shy of inviting. Blue and green are cool colours, which mean their emotional effect is to distance the typical viewer instead of attracting him, so my tendency when I'm working with a scene of unrelieved coolness is to find some way – any way – to introduce a bit of warmth.
I could have screwed a warming filter onto my lens, but that would have shifted the sky colour (besides I don't own a warming filter!). Or I could have returned to the same spot on successive mornings much closer to dawn in hopes of getting both light and sky just right. Instead, we'll achieve the same goal in post-processing. Mordor and Gondor, remember? ;) I fiddled around with the HSL sliders for quite a while. Here's what I ended up with:
8. HSL green hue -50, yellow hue -15.
9. HSL yellow saturation +24, orange saturation +33. (Yes, folks: an actual saturation increase. If you happen to have followed this site for the past few years, you'll know just how rare that's become. ;)
7. Examine the image at 100% or 200% magnification: noise level looks fine.
This time I'll make use of Lightroom's sharpening tools instead of solely relying on Photoshop's. What I like about Lightroom's sharpening is that it seems to selectively avoid haloes in high contrast areas.
8. Sharpening: Amount 69, Radius 1.0, Detail 22, Masking 57. (I switch between 100% and 200% magnification when I do sharpening.)
9. Correct for very slight CA using the provided slider.
9. No other global changes, so export to Photoshop.
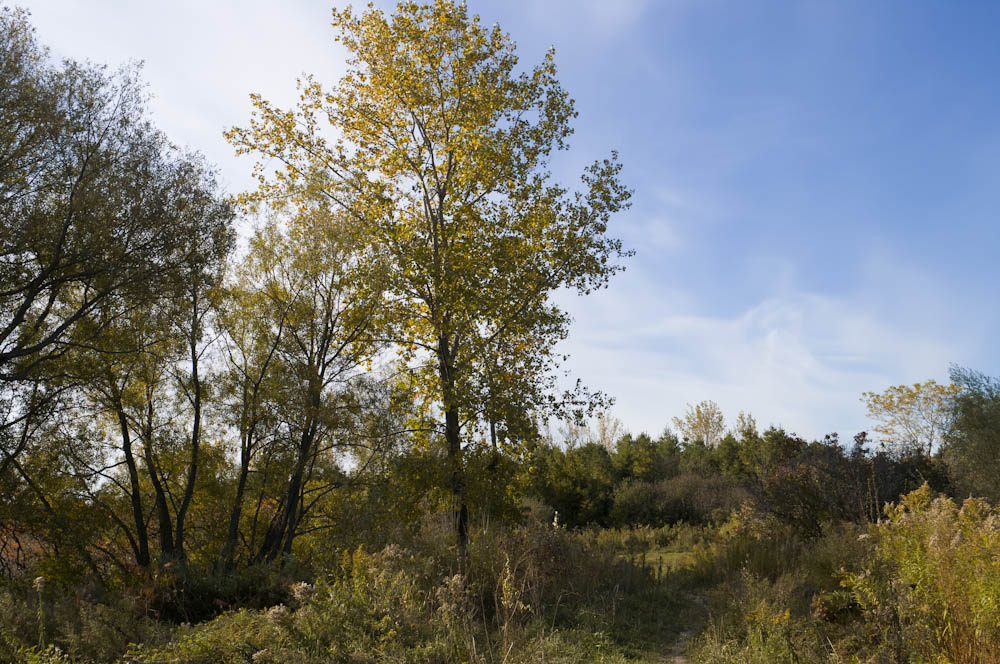
Fig. 4: final output from Lightroom
Notice how different Fig. 4 is from Fig. 1: this time we've done a lot of work in Lightroom. I'm not aware of any other converter that has HSL controls besides Lightroom and Adobe Camera Raw, so if you're using another product, you'd just defer the HSL changes in the converter and replicate them in your editor.